How to Transcribe Interviews: A Practical Guide for Accurate Results
Knowing how to transcribe an interview is about much more than just typing out what was said. It's about turning a conversation into a searchable, accurate, and permanent asset. You’re essentially transforming raw audio or video into a powerful text document you can analyze, repurpose, and share—unlocking huge value whether you're a researcher, journalist, or content creator.
Why Does Accurate Transcription Really Matter?
Most people see transcription as a chore, a necessary evil to get through. But once you shift your perspective and see it as a foundational step in your work, its real importance becomes clear. A good transcript isn't just a record; it's a tool that helps you find deeper insights and gives your original interview a much longer life.
From my own experience, a UX researcher can quickly search through dozens of user interview transcripts to find every mention of a specific pain point. Trying to do that by just re-listening to hours of audio would be a nightmare. In the same way, a podcaster can take a great conversation and spin it into a keyword-rich blog post, making their content way more visible on Google.
Unlocking Value Across Professions
The need for precise transcription pops up everywhere, and different fields get unique benefits from it. The written record becomes a specific tool to help them get the job done right.
Here are just a few real-world examples I've seen:
- Journalists live and die by their quotes. A word-for-word transcript means they can publish what was said with total confidence, protecting their credibility.
- Qualitative Researchers dive deep into transcripts to find themes and patterns. They're looking for the nuances in how participants respond, which only a detailed text can reveal.
- Content Marketers are masters of repurposing. They’ll pull key moments from an interview and turn them into social media clips, articles, and case studies, getting the most bang for their buck.
- Legal Professionals depend on certified transcripts for depositions and meetings. For them, a single misplaced word can have massive consequences, so accuracy is non-negotiable.
The demand is massive. The legal transcription market alone was valued at USD 25.38 billion in 2024 and is expected to hit USD 53.8 billion by 2034. North America is driving a huge piece of that, with an estimated revenue of USD 11.62 billion in 2024. You can read the full research about the legal transcription market to see just how big this industry is.
The real power of a transcript is its ability to make spoken words tangible. It allows you to search, analyze, and share insights that would otherwise be lost in a recording.
When you get good at transcribing interviews, the process stops being a chore and starts becoming a strategic advantage. It gives you the solid foundation you need to produce high-quality, impactful, and verifiable work, whatever your industry. If you skip this step or do it poorly, you're just leaving valuable information on the table.
Step 1: Prepare Your Audio for a Flawless Transcription
Here’s something I learned the hard way: the quality of your transcript is decided long before you ever upload a file. Getting clean, clear audio is the most critical part of the entire process. It’s the foundation for everything that follows.
If your audio is muddy and full of noise, the best AI in the world will struggle, and you'll be stuck fixing an endless stream of errors. My first few attempts at transcribing interviews were a complete mess for this exact reason—I just hit record without thinking about the sound. A little prep work upfront can save you hours of headaches on the back end.
Find the Right Recording Space
First things first: control your environment. Trying to record in a bustling coffee shop or a room with a humming air conditioner is asking for trouble. All that background chatter and ambient noise competes directly with your speaker's voice, confusing the transcription software.
Look for a quiet spot with minimal echo. Small rooms with soft furnishings are your best friend—think carpets, curtains, and couches. These materials absorb sound and kill that hollow, reverberating quality that makes audio hard to decipher. If you’re stuck in a bare room, throwing a few blankets over chairs or on the walls can make a surprisingly big difference.
Use a Decent Microphone
Your phone’s built-in mic might be convenient, but it’s not built for this kind of work. It’s designed to pick up sound from every direction, which means it will grab every distracting noise in the room.
A simple external microphone is the single biggest upgrade you can make to your audio quality.
- Lavalier (Lapel) Mics: These are my go-to for one-on-one interviews. You just clip one onto each person’s shirt, and you get crisp, consistent audio no matter how much they move around.
- Omnidirectional Mics: If you’re recording a group of people sitting around a table, placing one of these in the center is a great way to capture everyone clearly.
- USB Condenser Mics: For remote interviews on your computer, a solid USB mic like a Blue Yeti is light-years better than what’s built into your laptop.
My Pro Tip: Always, always do a soundcheck. Before the interview officially kicks off, record 30 seconds of test audio and listen back with headphones. You’ll immediately catch any buzzing, distortion, or volume issues that could have ruined the entire recording.
Finally, if you have the option, record in a high-quality, uncompressed format like WAV. MP3s are popular because the files are smaller, but that's because they're compressed, which means some audio data gets thrown away. You can always convert a WAV to an MP3 later, but you can’t get that lost quality back. If you’re starting with a phone recording, our guide on how to convert a voice memo to MP3 can help once you've captured that initial high-quality file.
Step 2: Choose Your Transcription Method (Human vs. AI)
https://www.youtube.com/embed/JhIYNRFBxKI
Now that your audio is ready, you've hit a fork in the road. How you get your interview transcribed will have a big impact on your project's cost, speed, and accuracy. So, do you go with a human or an AI?
Honestly, there’s no single right answer here. The best choice really comes down to your specific needs. You can go the traditional route with a professional human transcriber, opt for the speed of a fully automated AI service, or take a middle path that blends the two.
Let's break down each option so you can figure out what makes the most sense for you. Your decision will likely come down to balancing your budget, your deadline, and just how perfect the final transcript needs to be. For a legal deposition, for instance, you can't afford any mistakes. But if you're just pulling quotes for a blog post from a podcast, a few small errors are probably no big deal.
Transcription Method Comparison
To make this choice a little easier, it helps to see the three main approaches side-by-side. Each method has its own set of pros and cons depending on what you value most—be it flawless accuracy, lightning-fast turnaround, or cost-effectiveness.
Ultimately, the hybrid approach often provides the best of both worlds, giving you a high-quality transcript without the high cost or long wait time of purely manual services.
The Case for Manual Transcription
Going with a manual transcription means a real person listens to your interview and types everything out. This has long been the gold standard for accuracy, and for good reason. Professional transcribers are amazing at navigating tricky audio. They can easily handle heavy accents, dense industry jargon, and conversations where people are talking over each other—all things that can still trip up an AI.
But that level of quality comes at a price. Manual services are quite a bit more expensive and take much longer. You can expect to wait anywhere from 24 hours to several days for a human to finish a job that an AI could knock out in just a few minutes.
The Rise of AI Transcription
AI transcription tools have come a long way and are now the default for most everyday projects. They use powerful speech-recognition algorithms to turn your audio into text at a tiny fraction of the cost and time. For interviews with clear, high-quality audio, the results can be fantastic.
This space is absolutely booming. The global transcription market was recently valued at USD 31.9 billion, and the business interview segment alone is expected to hit USD 9.5 billion soon. This incredible growth is almost entirely driven by AI technologies that now boast accuracy rates of up to 99%. If you're curious, you can dig into these transcription software statistics and market trends to see just how quickly the tech is evolving.
For example, here's a peek at the dashboard for Otter.ai, a popular AI tool.
You can see how platforms like this keep everything organized, making it simple to find, review, and edit your transcripts.
The main catch? AI isn't infallible. It might stumble over unique names, technical terms, or the subtle nuances of a conversation. This means a human will still need to give the final text a once-over to catch any mistakes.
Finding the Sweet Spot with a Hybrid Approach
For most people, the hybrid model is the perfect compromise. The workflow is simple: you let an AI service like Otter.ai or Trint generate a rough draft in minutes, and then a human—either you or a professional editor—swoops in to clean it up.
This method gives you the speed and affordability of AI combined with the precision of a human touch, making it the most efficient workflow for most interview transcription needs.
You get a transcript back almost instantly, which means you can jump right into the important work of polishing and pulling insights instead of typing out every single word. If you're weighing your options, our guide to the best online transcription service can help you find a tool that fits this exact workflow. It's a smart strategy that saves a ton of time and money without sacrificing much in the way of quality.
Step 3: Use an AI Transcription Workflow (Upload to Edit)
Getting a clean audio file into the system is ground zero for a great AI transcription. The right upload method really sets the tone for how accurate that first draft will be. In HypeScribe, you can just drag and drop a file, paste a link, or even record directly—it’s a one-click process that gets you started fast.
We've put together a guide on auto-transcribe software that dives deep into these optimized workflows. Trust me, every single moment you save on the front end pays off big time when you get to the editing stage. A smooth import means you get your transcript back that much faster.
Preparing and Uploading Your Audio File
Before you even press record, think about your file format. It’s a trade-off between quality and file size. I personally swear by WAV or AIFF for their uncompressed clarity, especially for really important interviews. But if you're short on space, a high-quality MP3 will do the job.
Here are a few pro tips I've picked up over the years:
- Stick with a 44.1 kHz sample rate for most standard audio—it’s the sweet spot.
- Get your files organized from the start. A simple naming convention like “ClientName_Date.wav” saves so many headaches.
- If you have a few minutes, run the audio through a simple editor to snip out long silences or obvious background noise before you upload.
I once saved myself about 20 minutes of tedious editing just by trimming out some dead air from a recording beforehand. This little bit of prep work helps ensure the AI is focusing on actual speech, not the hum of an air conditioner.
Reviewing the AI Draft and Assigning Speakers
Once the AI works its magic, you'll get a transcript with speaker labels and timestamps. It’s super tempting to just skim this part, but getting the speakers right is absolutely crucial for understanding the conversation's context. I always make it a point to rename the generic "Speaker 1" and "Speaker 2" labels right away.
When your speaker tags are accurate, it makes the entire analysis process clearer and more traceable.
Sometimes the AI gets a little confused, especially with crosstalk. Here’s a quick-and-dirty guide to fixing common labeling issues:
Honestly, this part usually takes me less than 5 minutes, but it makes the rest of the process so much easier.
It's a growing field, too. The global interview transcription software market is currently valued at approximately $2 billion in 2025. It’s projected to grow at a compound annual growth rate (15% CAGR) through 2033, which would put it close to $6 billion. You can find more details on interview transcription software growth if you're curious about the industry trends.
Refining and Editing Your Transcript
Now for the polish. This is where you correct any words the AI fumbled and make the text flow naturally. Keyboard shortcuts are your best friend here. I’m constantly using Ctrl+↑/↓ to jump between sections and Ctrl+E to merge lines. I also find that listening back at 1.25x speed is the perfect pace for proofreading without getting bogged down.
Here’s my typical editing checklist:
- Play back tricky words at a slower speed, like 0.8x, to catch subtle errors.
- Merge or split paragraphs so they accurately reflect when a speaker starts and stops.
- Add notes or flag action items as I go, so I don’t have to do a separate pass later.
I recently had to transcribe a long legal deposition. It was dense stuff. By using the fast-forward function to skip pauses and relying heavily on hotkeys, I cut my total edit time by a solid 40%. It felt more like watching the highlights of a game than slogging through the whole thing.
Once everything looks good, it's time to export. Whether you need a simple TXT file, a formatted DOCX, or an SRT for video captions, just pick the format that fits your needs. One final skim for consistency and you’re ready to deliver a professional-grade transcript.
Don't forget to use the summary tools to your advantage. HypeScribe can generate smart summaries and pull out key action items automatically, which is a massive time-saver.
- Use topic tags to group quotes by theme.
- Highlight important keywords so you can search for them later.
- Export specific snippets for quick sharing or for dropping into a report.
These features can turn that raw wall of text into usable meeting minutes, a first draft of a blog post, or a set of study notes in no time. Always save a backup, and if you’re working with a team, think about using some form of version control.
Making the most of integrated editing tools doesn't just cut down on manual work—it helps keep the original context of the interview intact.
With a good system in place, you can get incredibly efficient at transcribing interviews with AI. Play around with playback speeds and find the shortcuts that work for you. Before you know it, you’ll be turning hours of audio into actionable, polished content in a fraction of the time.
Step 4: Format and Export Your Final Transcript
After you've cleaned up the AI's initial draft, the last step is to get the transcript formatted and ready for the real world. A perfect transcript is one thing, but making it easy to read, scan, and use is what really matters. Good formatting is the difference between a confusing wall of text and a professional document that's a breeze to analyze and share.
The first big choice you'll make is the style: verbatim or clean verbatim.
A true verbatim transcript is a word-for-word account of everything said. That means every "um," "ah," stutter, and false start gets included. This level of detail is critical for things like legal depositions or deep qualitative analysis where every single utterance is significant.
On the other hand, clean verbatim (sometimes called intelligent verbatim) is what most people need. It cleans up the dialogue by removing all those filler words and stammers, giving you a polished, readable version of the conversation. If you're creating content, writing an article, or preparing business notes, this is almost always the way to go.
Polishing Your Transcript for Readability
With your style decided, it's time to apply a few formatting conventions that make the transcript professional and easy to follow. These small tweaks have a massive impact on how easily someone can digest the information.
Here are the non-negotiables for a readable transcript:
- Clear Speaker Labels: Always label who is speaking (e.g., Interviewer: or Dr. Evans:). Make sure to start a new paragraph every time the speaker changes. This is probably the most important thing you can do for clarity.
- Helpful Timestamps: You don't need a timestamp on every line, but dropping one in every minute or so (or at the start of a key paragraph) makes it incredibly simple to jump back to the original audio to check something.
- Honest Annotations: If you hit a part of the audio that's completely unintelligible, don't just guess. Use a clear note like [inaudible 00:15:22] or [crosstalk 00:21:10]. This keeps your transcript accurate and trustworthy.
This simple infographic lays out the basic workflow, from the initial audio file to the final, polished transcript you create.
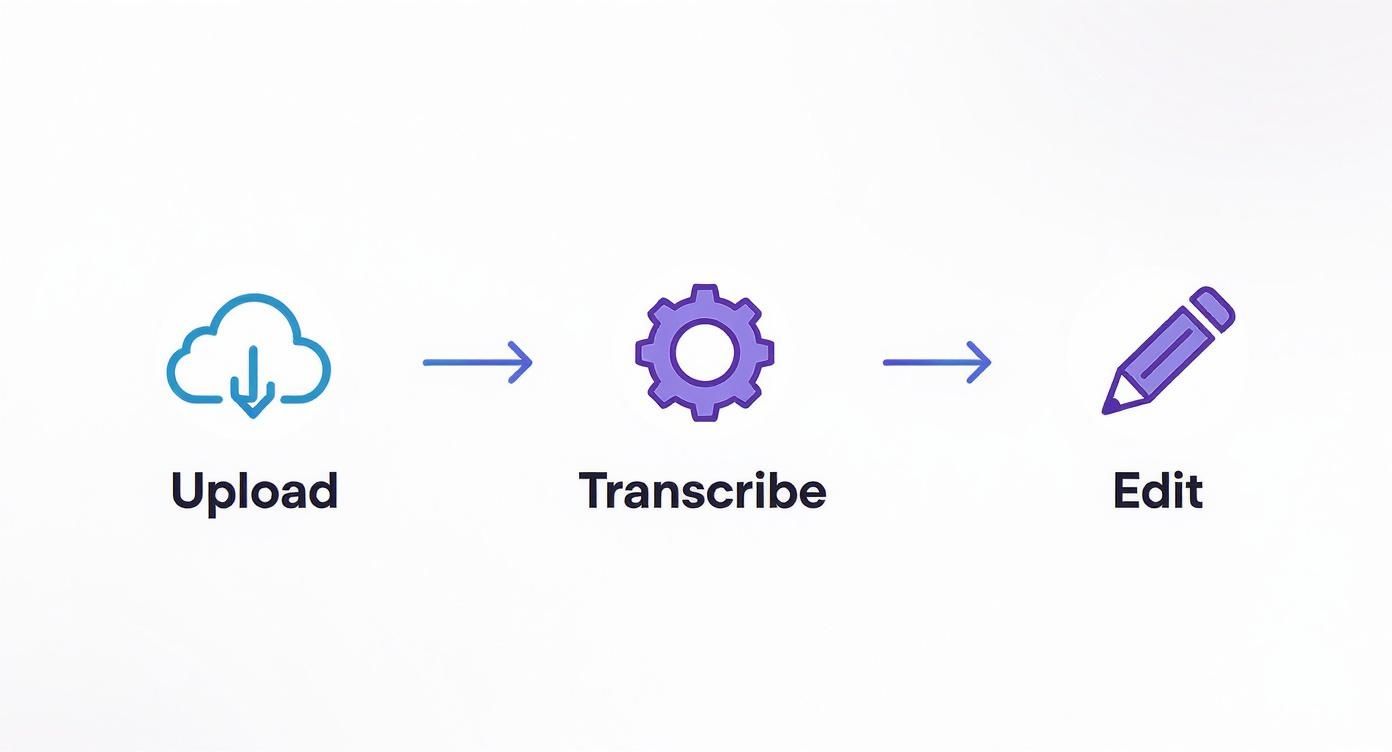
It's a straightforward process: upload the file, let the AI do the heavy lifting, and then you come in to refine the output. This is the foundation of any modern transcription project.
Choosing the Right Export Format
Once you're happy with the transcript, your tool will give you a few ways to export it. What you choose depends entirely on what you plan to do next. Picking the right file type from the start saves a ton of time and prevents annoying conversion issues down the line.
Choosing the correct export format is the final handoff in the transcription process, ensuring your hard work is immediately usable for analysis, content creation, or archiving.
Here are the most common formats and when to use them:
- .DOCX (Microsoft Word): This is the workhorse for most people. It keeps all your formatting—bold text, speaker labels, paragraphs—intact. It's perfect for turning your interview into a report, an article, or a document you can easily share with your team.
- .TXT (Plain Text): Think of this as the no-frills option. It strips out all styling, leaving you with just the text. It’s great for importing into other software or for simple archiving where you just need the raw content.
- .SRT (SubRip Subtitle): If you transcribed a video, this is the one you need. SRT files are specifically designed for captions, containing the text broken down into timed chunks. This makes it a snap to add subtitles to platforms like YouTube or Vimeo.
Common Questions About Transcribing Interviews
When you start learning how to transcribe interviews, you'll quickly run into the same few questions that everyone asks. Getting a handle on these early will save you a ton of headaches down the road, no matter if you're using an AI tool, a human service, or doing it yourself.
Think of this as your cheat sheet for sidestepping common mistakes. Knowing the answers to these will give you the confidence to handle any interview you throw at it, from a simple one-on-one call to a chaotic group discussion.
How Long Does It Really Take to Transcribe an Hour of Audio?
This is the ultimate "it depends" question, but here’s a realistic breakdown based on my experience. If you hire a seasoned professional to transcribe manually, they usually work at a 4:1 ratio. That means one hour of clear audio takes about four hours of their focused time. If you're a beginner trying to do it yourself? That can easily balloon to 6-8 hours.
AI transcription tools completely change the game here. They can spit out a full first draft in just a few minutes. The real work is in the cleanup. For a clean recording, you might spend 15 minutes polishing the text. For audio with background noise, accents, or technical jargon, you could easily spend an hour or more making corrections.
What's the Difference Between Verbatim and Clean Verbatim?
Picking the right transcription style is one of the most important decisions you'll make. It determines whether your final transcript is useful or just a jumbled mess.
- Verbatim: This is the "warts and all" approach. It captures every single utterance—the "ums," "ahs," stutters, false starts, and even non-verbal sounds like laughter or a door slamming. This level of detail is critical for things like legal depositions or in-depth academic research where every nuance is analyzed.
- Clean Verbatim: Sometimes called "intelligent verbatim," this style cleans up the conversation to make it readable. It strips out all the filler words and conversational tics, leaving you with a polished text that gets straight to the point. This is the standard for journalism, marketing content, and most business meetings.
For almost everything you'll do, clean verbatim is the way to go. It gives you a professional, easy-to-digest document that honors what the speaker said without all the distracting noise.
How Do I Handle Multiple Speakers Without It Becoming a Mess?
Juggling a conversation with three, four, or more people can get confusing fast. The key is to be relentlessly consistent.
Always assign a clear, unique label to each person. You could use their role ("Interviewer," "Participant A") or their name ("Dr. Evans," "Maria").
The golden rule? Start a new paragraph every time the speaker changes. This simple formatting trick makes a world of difference for readability. While modern AI tools are getting surprisingly good at automatically detecting and labeling speakers, you absolutely need to review their work. I’ve seen them get confused, so a quick human check is essential to make sure Dr. Evans isn't suddenly credited with saying something Maria said.
What Do I Do When a Word Is Inaudible?
It's inevitable. No matter how great your recording equipment is, you'll hit a patch of audio where you just can't decipher a word or phrase. A car horn blares, someone coughs, or the connection drops for a second.
Don't guess. You'll compromise the integrity of the entire transcript. The professional standard is to mark the spot clearly.
Just use a timestamped placeholder like [inaudible 00:21:14] or [unintelligible 00:21:14]. This tells the reader that a piece of information was missing, preserving the accuracy of everything you could hear.
Ready to turn your interview recordings into polished, actionable text in minutes? HypeScribe uses advanced AI to deliver fast and accurate transcripts, along with smart summaries and key takeaways, so you can go from conversation to content in a fraction of the time. Try it for free today at hypescribe.com.


