How to Rip Audio from YouTube Videos: A Practical Guide
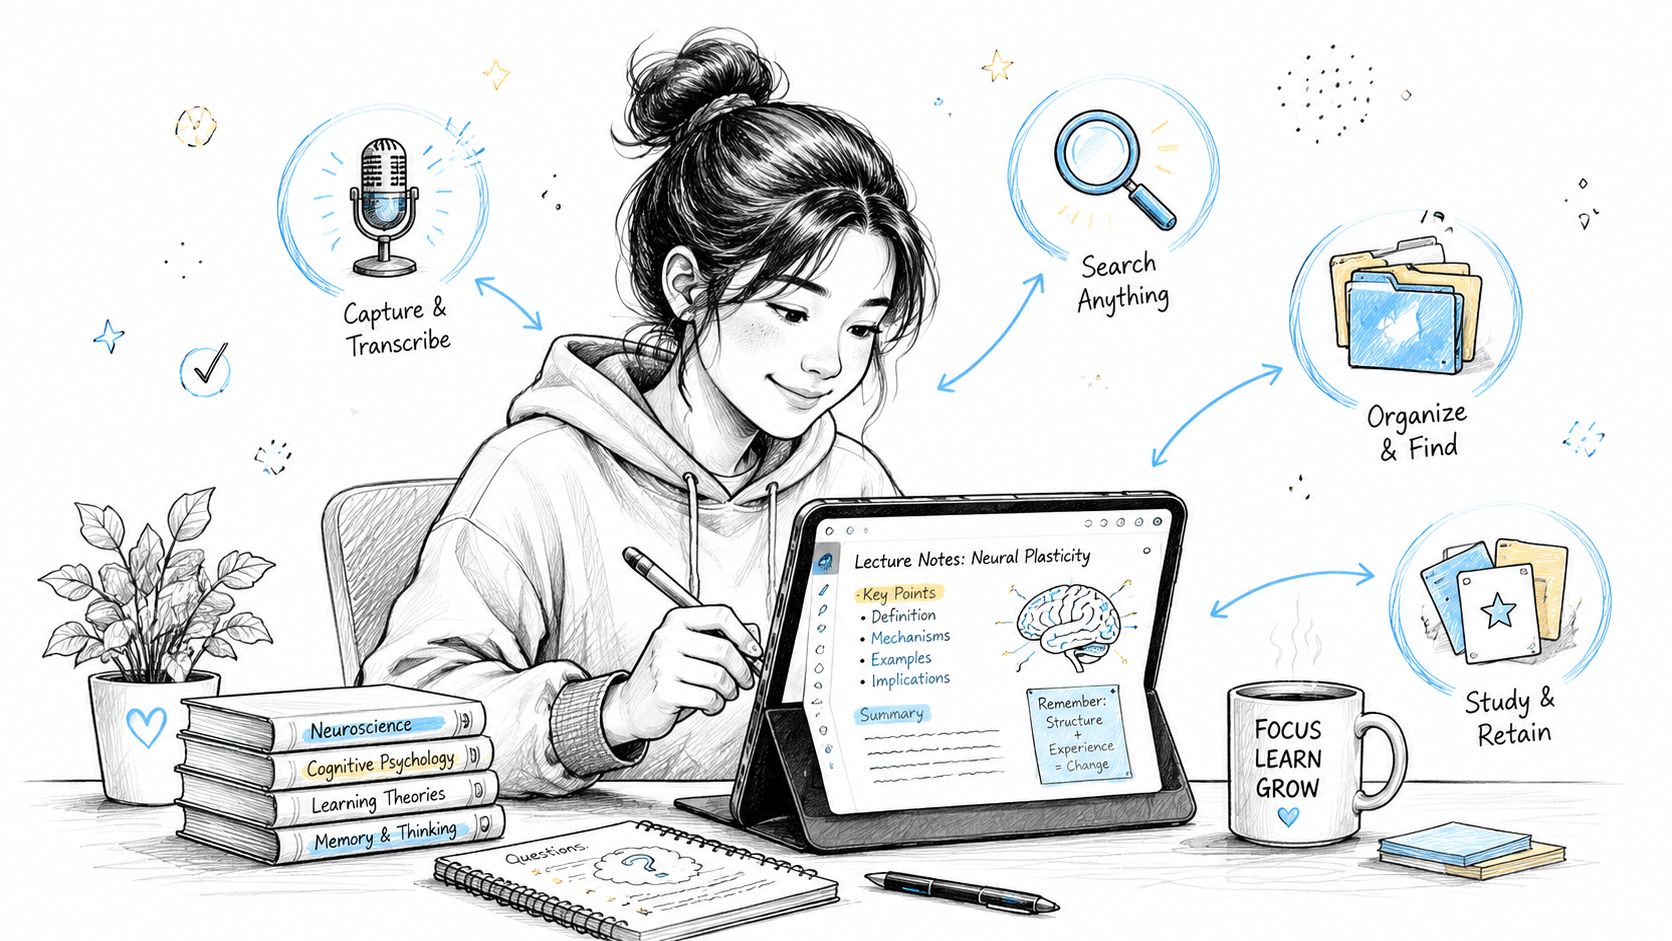
Extracting the audio from a YouTube video is about so much more than just saving a song. From my own experience, it's a genuine productivity hack. You can turn a two-hour lecture into a study guide for your commute, transform a webinar into a set of actionable notes, or even spin a video interview into a brand-new podcast episode. This guide will walk you through exactly how to do it, based on years of using these techniques in real-world scenarios.
Why Rip Audio from YouTube? The Real-World Use Cases
Let's be honest, the idea of "ripping" audio from YouTube used to be all about grabbing music. But that's changed. Now, it’s a go-to move for professionals, students, and creators who need to get at the valuable information locked away inside a video. It's less about downloading, more about efficiency.
The reason for this shift is simple: YouTube is overflowing with incredible educational and professional content. I've seen marketing teams do this to analyze a competitor's long webinar. Instead of making everyone sit through it, they just pull the audio. The team can listen on their own time, and the key points can be transcribed and summarized into a quick intelligence brief. No one has to be glued to a screen for hours.
Unlocking Content for Everyday Scenarios
The practical uses here are incredibly broad and solve problems I encounter all the time. Students do this constantly, converting dense university lectures into MP3s. It makes reviewing complex topics before an exam so much easier when you can just listen back instead of re-watching the whole thing.
For content creators, this is a core part of the job.
- Podcast Creation: That great interview you filmed for your YouTube channel? Rip the audio, and you've got an instant podcast episode ready for Spotify or Apple Podcasts, reaching a whole new audience.
- Content Repurposing: You can pull a powerful monologue or a funny clip from a longer video and use that audio bite for an Instagram Reel or a TikTok. It’s a quick way to create engaging short-form content.
- Accessibility: Offering an audio-only version of a video tutorial is a fantastic way to make your content accessible to visually impaired users or just people who prefer to listen while they’re driving or working out.
When you stop thinking of this as just "downloading" and start seeing it as a strategic workflow, you can squeeze so much more value out of a single video. Exploring different content repurposing strategies can open up even more ideas for getting your message out there.
Which Method for Ripping YouTube Audio is Best for You?
Trying to pick the right tool for grabbing audio from a YouTube video can feel a bit overwhelming. There are a ton of options out there, and it’s not always clear which one is best for the job. I’ve spent a good amount of time testing the main approaches, and the key is to match the tool to your specific goal, whether you just need a quick sound bite or you're archiving high-quality audio for a project.
The need for these tools is massive, and it’s easy to see why. More than 500 hours of video get uploaded to YouTube every single minute. That works out to a mind-boggling 720,000 hours of new content every day. With so many podcasts, interviews, lectures, and concerts available, it’s only natural to want to pull the audio for offline listening or other uses.
To help you figure out the best path forward, this decision tree gives you a quick visual guide based on what you’re trying to accomplish.
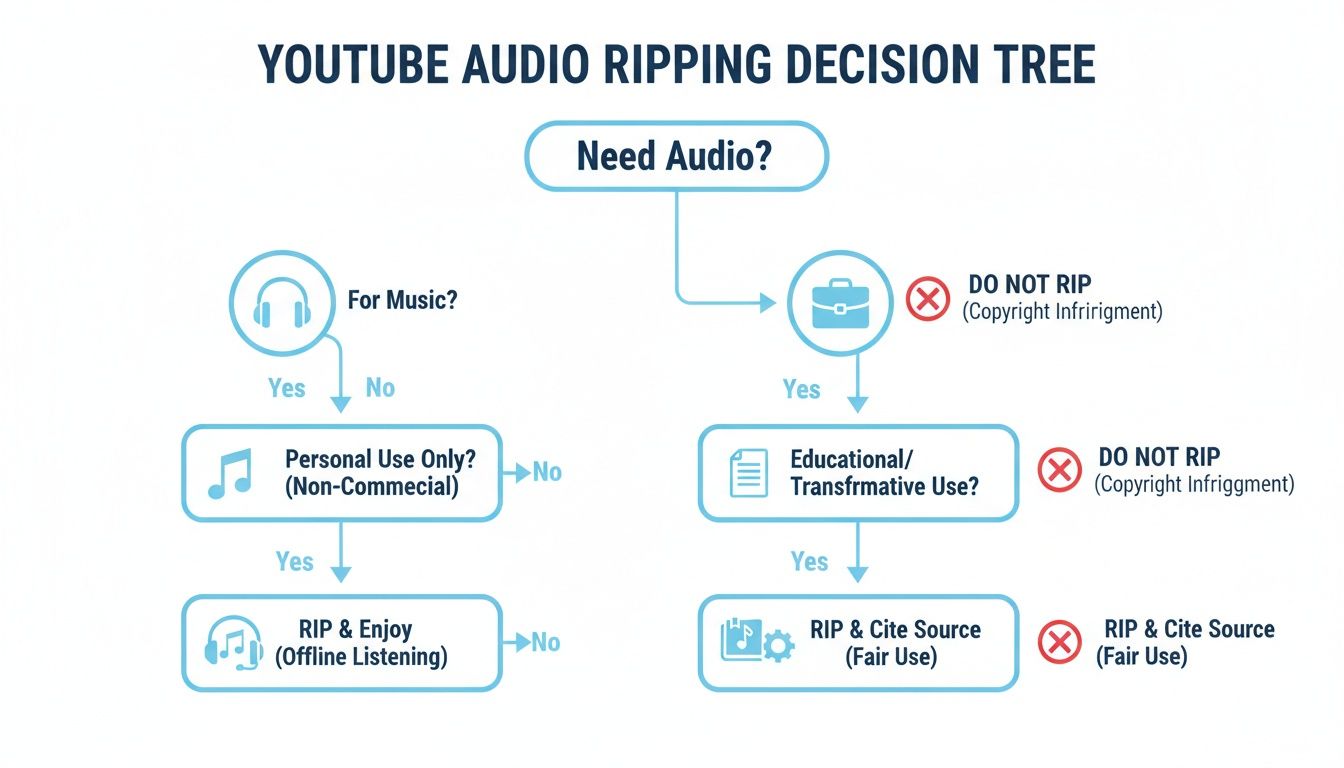
The main takeaway? Your reason for ripping the audio should guide your choice. A quick, personal download has different needs than a professional project, so you'll want to balance convenience with quality and security.
A Quick Comparison of YouTube Audio Ripping Methods
To simplify things, I've put together a quick comparison table. It breaks down the four main methods for pulling audio from YouTube, showing you at a glance what each is good for, along with its pros and cons.
This table should help you narrow down the options based on your comfort level with technology and the quality you need for your final audio file.
Method 1: Online Converters (The Quick and Easy Option)
For most people, online converters are the first stop. They’re dead simple: find a site, paste in the YouTube URL, hit a button, and download the MP3. You don't have to install anything, which means they work on any computer or phone with a web browser. This makes them perfect for grabbing a single podcast or lecture on the fly.
But that convenience has some serious downsides. These websites are often plastered with aggressive pop-up ads and confusing download buttons, which can trick you into installing malware. You also get very little say in the audio quality, as most default to a lower bitrate like 128kbps. That’s fine for spoken word, but it won’t do justice to music.
From my experience, online converters are best for non-critical, one-off tasks where speed is more important than security or audio fidelity. Always use a reliable ad-blocker and be cautious about what you click.
Method 2: Browser Extensions (For Seamless Integration)
Browser extensions feel like a real step up. Once you install one, it usually adds a "Download" button right on the YouTube page itself. This gets rid of the whole copy-and-paste routine, making the process of ripping audio from YouTube videos feel much more natural, especially if you find yourself doing it often.
The trade-off here is reliability. Browser updates or changes to YouTube's code can easily break an extension, sometimes for days. It's also critical to do your homework—some extensions have been caught snooping on user data. Stick to ones from reputable developers with a solid history of positive reviews. They're a great middle ground, but they require a bit of vetting.
Method 3: Dedicated Desktop Software (The Power User's Choice)
If you're serious about audio quality or need to download in bulk, dedicated desktop software is the way to go. There’s simply no comparison. Tools like 4K Video Downloader or even the versatile VLC Media Player give you total control and peace of mind. You can download entire playlists at once, choose high-quality audio formats like FLAC or 320kbps MP3, and completely sidestep the security risks of web-based tools.
Yes, you have to download and install something first, but that initial time investment pays off handsomely in reliability and features. If you're constantly pulling audio for professional work—like sampling for a music project or archiving research interviews—the control you get from desktop software isn't just nice to have, it's essential.
Before getting too deep into the YouTube-specific tools, it’s helpful to understand the basics of separating audio from video in general. If you're interested, you can learn how to extract audio from video files to get a good handle on the core concepts.
Method 4: Command-Line Tools (For Ultimate Control)
Finally, for those who aren't afraid of a terminal window, command-line tools like youtube-dl (and its popular successor, yt-dlp) offer a level of power and flexibility you can't get anywhere else. These tools are lightweight, incredibly fast, and completely free of ads or trackers. You can write scripts to automate downloads, specify exact audio formats and bitrates, and even bake them into more complex workflows.
The catch, of course, is the steep learning curve. There’s no graphical interface to click around in, so you need to be comfortable typing out commands. It's definitely overkill for a casual user, but for developers, data archivists, and media pros who need granular control, it’s the undisputed champion.
A Better Way: The Integrated Rip-and-Transcribe Workflow
The old way of ripping audio from YouTube is a two-step shuffle. First, you have to download the file. Then, you have to upload that file somewhere else to get it transcribed. It's a clunky, time-consuming process that leaves you with extra files cluttering up your computer.
But what if you could just skip the download altogether?
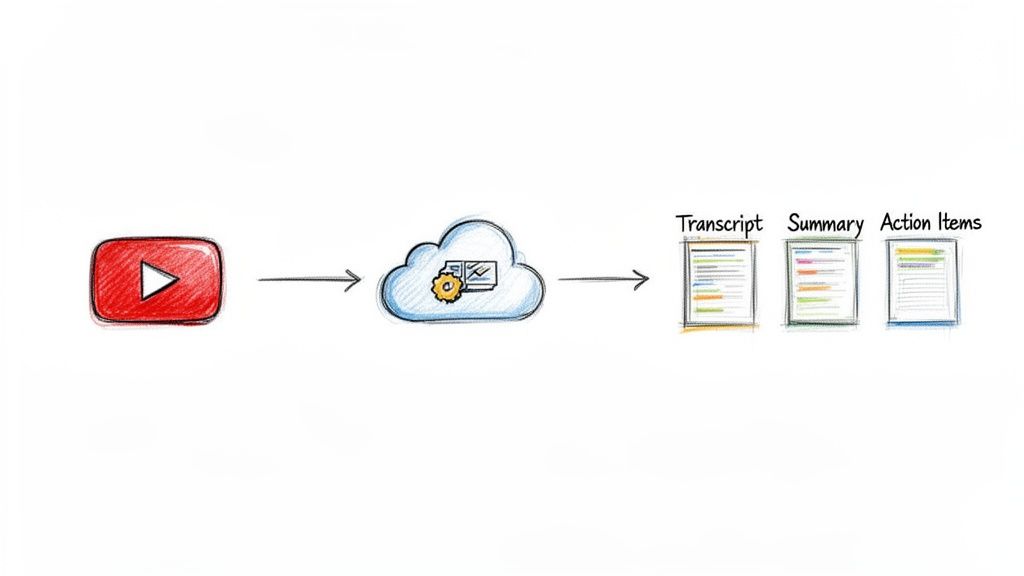
A modern, integrated workflow does exactly that. Instead of treating the task as "getting an audio file," this approach is all about getting the insights. By using a tool that works directly with the YouTube link, you can turn a video into a full transcript, a clean summary, and even a list of action items in just a few clicks. It's a complete game-changer.
From Manual Ripping to Instant Analysis
Think about the time this saves. A journalist covering a 60-minute press conference doesn't need to waste time downloading a huge audio file, waiting for it to process, and then feeding it into a separate transcription app. They just paste the YouTube URL and can immediately start pulling quotes and finding the most important moments.
This is all about efficiency. It removes the annoying middle steps between finding a great video and actually putting its content to use. The goal is no longer just ripping audio from YouTube; it's about instantly unlocking the knowledge trapped inside.
This diagram shows how a single link can kick off a whole analysis process—generating a transcript, summary, and even chapter breakdowns without you ever needing to download a thing.
A Practical Walkthrough with HypeScribe
Let's look at how this works in the real world. With a service like HypeScribe, the process couldn't be simpler.
- Find your video. Grab the YouTube link for the lecture, team meeting, or product demo you need to work with.
- Copy the URL. Just copy the link straight from your browser's address bar. No need for any external downloaders or sketchy converter sites.
- Paste and go. Pop the link into the tool. The AI handles the rest, analyzing the video's audio stream in the cloud without ever downloading a file to your device.
For an hour-long video, you'll have a complete, time-stamped transcript back in about 30 seconds. But that's not all. You also get an AI-generated summary that pulls out the main points and a list of key takeaways. The entire process is automatic.
By ditching the download step, you not only save a ton of time but also sidestep the security risks that come with shady third-party converter websites. The focus shifts from managing files to getting information.
This integrated approach is where content analysis is heading. While knowing how to rip a file manually is a good skill to have, the real productivity gains come from turning that content into actionable text. You can see how this works and learn more about how to convert audio to text from all kinds of sources. Once you have the audio, using dedicated software for transcribing video is the logical next step to get an accurate text version. This is where you'll find the biggest boost to your workflow.
Choosing the Right Audio Format and Quality
You've successfully ripped the audio from a YouTube video—now what? The next step is a crucial one that directly impacts both file size and sound clarity: choosing the right audio format and quality settings.
This isn't just a technical box to tick. It’s like deciding between a high-res photo and a tiny, pixelated thumbnail. Both are images, but they're built for completely different jobs. You need to strike a balance between getting audio that sounds great for your needs and ending up with a file that’s not a nightmare to store or send.

Lossy vs. Lossless Formats Explained
Audio files generally fall into two main categories: lossy and lossless. Understanding the difference is key to making the right choice.
- Lossy Formats (MP3, AAC): These are the workhorses of the digital audio world. They’re popular because they use smart compression to shrink file sizes by removing bits of sound data our ears are unlikely to notice. This makes them perfect for most everyday uses, like listening on your phone, sharing clips, or transcribing interviews. An MP3 will be dramatically smaller than its lossless equivalent.
- Lossless Formats (WAV, FLAC): These are the purists' choice. They keep every last bit of the original audio information intact. A WAV file is a completely uncompressed, bit-for-bit perfect copy, while FLAC offers the same pristine quality but with clever compression that reduces the file size without losing any data. You’d only reach for these if you're doing professional audio editing, music production, or archiving something for posterity.
For almost everything you'll do with ripped YouTube audio, a high-quality lossy format is the way to go. It gives you fantastic sound in a practical, manageable package.
Finding the Sweet Spot with Bitrate
With lossy formats, quality is all about bitrate, which is measured in kilobits per second (kbps). The higher the bitrate, the better the sound—and the bigger the file.
A common pitfall is just picking the lowest bitrate to save a bit of space, but this almost always results in audio that sounds tinny, muffled, or full of weird artifacts. Here’s a quick rundown to help you choose wisely:
- 128 kbps: This is pretty low quality. It’s passable for spoken-word content like a lecture where clarity isn't paramount, but it will make music sound disappointingly flat.
- 192 kbps: A great middle-of-the-road option. It offers a solid listening experience for most purposes and keeps file sizes reasonable.
- 320 kbps: This is considered high-quality for MP3s. If you’re grabbing music or any audio where detail really matters, this is your best bet. For most people, the difference between a 320 kbps MP3 and a lossless file is virtually impossible to hear.
The power of high-quality, accessible audio is becoming undeniable. In a major trend that emerged in 2024, creators who added multi-audio tracks to their videos saw their views spike by as much as 45%. As reported by creator trends on air.io, some found that ripping and dubbing audio for other platforms helped underperforming videos suddenly catch fire in the recommendation algorithm. It’s a powerful reminder of why picking the right format and quality settings from the start is so important.
If you often find yourself juggling different audio sources, our guide on how to convert a voice memo to MP3 might also be a lifesaver for getting all your files into a consistent format.
Is it Legal to Rip Audio from YouTube Videos?
While the tools to rip audio from YouTube videos are everywhere, it’s definitely not a legal free-for-all. Before you start downloading, it’s critical to understand where the lines are drawn so you can stay on the right side of the rules. The whole issue really comes down to two things: copyright law and YouTube's own terms.
Let's start with YouTube's Terms of Service. They're pretty explicit: you aren’t allowed to download any content unless YouTube itself provides a “download” button or a similar link for that specific video. This rule is there to protect the creators who own the copyrights to their work.
Copyright and Fair Use: It's All About Context
Now, this is where things get a bit more interesting. The reason you’re ripping the audio makes all the difference. There’s a world of difference between grabbing a chart-topping song to avoid buying it and saving a lecture for your personal study notes.
Here’s a practical way to think about it:
- Crossing the Line: If you download a popular artist's new album from YouTube to add to your music collection without paying, that’s a clear violation of both copyright and YouTube's terms.
- Likely Permissible: On the other hand, if you extract audio from a public domain university lecture to make a transcript for your study group, that almost certainly falls under "fair use" for educational purposes.
The key is your intent. Are you trying to get around paying the creator, or are you repurposing the content for something entirely new like personal analysis or private study?
The golden rule is to avoid causing financial harm to the original creator. If what you're doing directly competes with their ability to earn money from their work, you're probably in the wrong.
A Practical Guide to Responsible Ripping
To keep things straightforward and ethical, it helps to have a clear set of personal guidelines. This way, you can get the audio you need without stepping on any toes.
Here are a few best practices I always follow:
Stick to Your Own Content First: The absolute safest route is to rip audio from your own videos. If you uploaded a webinar, an interview, or a product demo, you have every right to repurpose that audio however you see fit.
Look for Public Domain & Creative Commons: A lot of content is intentionally made available for reuse. Search for videos labeled as "public domain" or licensed under Creative Commons, which often allows for reuse with certain conditions.
Focus on Personal or Transformative Use: Ripping audio to transcribe a meeting for internal team notes or analyzing a keynote speech for market research is a transformative act. You aren't re-uploading their content; you're using it for private analysis.
Never Redistribute Copyrighted Audio: This is the big one. Taking copyrighted audio and sharing it publicly, selling it, or using it in your own commercial project is a clear copyright violation.
By keeping these simple principles in mind, you can use audio-ripping tools responsibly. They become a powerful resource for your own work and content creation, all while respecting the original creators.
Frequently Asked Questions About Ripping YouTube Audio
As you get into ripping audio from YouTube, a few questions always seem to come up. It's totally normal to wonder about security, quality, and how to handle tricky situations like private videos. I'll walk you through the most common ones so you can feel confident you're doing it right.
Are "YouTube to MP3" websites safe to use?
Here's the deal: while they're tempting for a quick grab, many free online converters are a bit of a minefield. They often plaster their pages with aggressive pop-ups and sketchy download buttons designed to trick you into installing malware or adware. Some are even known to track your browsing habits.
If you absolutely must use one, make sure you have a good ad-blocker and your antivirus is running and up-to-date. But honestly, if you plan on doing this more than once, a dedicated desktop app or a trusted service is a much smarter, safer bet.
I have a simple rule I stick to: if a site bombards me with ads or pop-ups, I'm out. A single audio file just isn't worth compromising my computer's security.
Can I rip audio from a private or unlisted YouTube video?
This is a big one, and the answer is a little nuanced. For private videos, the answer is almost always no. Standard tools can't access them because they require you to be logged into a specific, authorized YouTube account, and there's no way for a third-party ripper to do that.
You have a much better shot with unlisted videos. Since anyone with the direct link can watch them, most tools can fetch the audio just fine. If you have permission to view a private video and need the audio, your best (though not ideal) option is to use screen recording software to capture the audio while it plays. Just be prepared for a potential hit in quality.
Does ripping audio from YouTube lower the quality?
Yes, unfortunately, some quality loss is pretty much baked into the process. Think of it this way: the audio on YouTube is already compressed. When you rip it, the file gets compressed again as it's converted to a new format like MP3.
To keep the audio sounding as crisp as possible, always choose the highest bitrate setting your tool offers. For MP3s, you're looking for 320 kbps. It won't sound better than the original YouTube source, but a high bitrate ensures it sounds as faithful to it as possible.
Ready to skip the downloads and get straight to the insights? HypeScribe lets you paste any YouTube link to generate transcripts, summaries, and action items in seconds. Experience the most efficient workflow for turning video content into actionable text. Try it free at https://www.hypescribe.com.