How to Transcribe Apple Voice Memos Accurately and Fast
Apple’s Voice Memos app is a fantastic tool for capturing ideas on the fly, recording important meetings, or saving an interview. But let's be honest—that audio file is often just the starting point. The real value comes when you need to turn those spoken words into usable text.
Based on my experience, the best way to transcribe Apple voice memos is a simple, two-step process. First, get the audio file off your device. Second, upload it to a dedicated AI transcription service like HypeScribe. This approach consistently gives me a fast, highly accurate transcript without the headache of manual typing.
Why Turn Your Voice Memos Into Text?
Voice Memos is everywhere. With Apple holding nearly 57% of the U.S. smartphone market, its built-in recording app is one of the most common ways people capture important audio. For a deeper dive into the app's features, AppleInsider offers some great tips.
But listening back and typing everything out yourself is painfully slow, filled with constant pausing, rewinding, and inevitable mistakes. I’ve been there, and it’s a frustrating way to spend an afternoon.
This is where a smart workflow saves the day. Instead of losing hours to manual transcription, you can have a polished, searchable document ready in just a few minutes. This isn’t just a time-saver; it’s about turning your raw audio recordings into something genuinely useful.
The Modern Transcription Workflow
The goal is to get from a raw recording to a finished document as smoothly as possible. When you do this, you unlock the real value hidden inside your voice memos. Suddenly, you can:
- Search for specific details in long recordings. I've used this to find a key client quote from an hour-long meeting in seconds.
- Create quick meeting summaries by pulling out major decisions and takeaways without re-listening to the whole thing.
- Repurpose your content easily. That great idea you recorded can become a blog post, a social media update, or a detailed project brief.
- Keep precise records for interviews, legal notes, or academic research where every word counts.
By converting your audio to text, you’re not just typing—you're building a searchable knowledge base. You can even use the transcript to create an automated action item list from your meeting transcripts, ensuring no follow-up tasks fall through the cracks.
The real value isn't just getting the words on a page; it's about making your spoken ideas searchable, editable, and ready for action. This small shift in process fundamentally changes how you interact with your own recordings.
To give you a clear picture of how this all works, I've put together a simple table that breaks down the entire process from start to finish.
Your Voice Memo Transcription Workflow At a Glance
This table outlines the essential stages for converting an Apple Voice Memo into a polished transcript using an AI service, highlighting the purpose and best practice for each step.
StageAction RequiredWhy It MattersCapture & ExportRecord your memo and share the audio file from your iPhone or Mac.This gets the raw material out of the app and ready for processing.AI TranscriptionUpload the audio file to an AI service like HypeScribe.The AI does the heavy lifting, converting speech to text in minutes.Review & RefineMake quick edits to the generated transcript for 100% accuracy.A final polish ensures the text is perfect for professional use.Export & UseDownload the transcript in your preferred format (e.g., Word, PDF, TXT).This final step makes the text available for reports, content, or records.
Following these steps transforms transcription from a chore into a simple, efficient part of your workflow.
Step 1: Get Your Voice Memos Off Your Apple Device
First things first: before you can transcribe anything, you need to get the audio file out of the Voice Memos app. Luckily, Apple makes this a pretty painless process, whether you're on your iPhone, iPad, or Mac. The best method really just depends on where the file needs to go next.
For example, if you just finished an interview on your iPhone and want to get it onto your Mac for transcription, AirDrop is your best friend. It's a direct, wireless transfer that literally takes seconds. But if I’m working with a team and need to share the file, popping it into a shared iCloud Drive or Google Drive folder is the way to go.
Your Go-To Sharing Options
Getting your recording out is as simple as finding the memo you want, tapping the "Share" button, and choosing your destination. Since something like 80% of iPhone users own at least one other Apple device, the whole system is built for this kind of seamless handoff.
When you hit that share button on your iPhone, you'll see a familiar menu pop up with all your options.

From here, you can send your memo almost anywhere. For transcription purposes, these are your most practical choices:
- AirDrop: Perfect for instantly beaming the file to your Mac or iPad.
- Mail or Messages: A quick and easy way to email the file to yourself or a colleague, especially for smaller recordings.
- Save to Files: This is super versatile. You can save the memo directly to iCloud Drive, a connected Google Drive or Dropbox account, or just onto your device's local storage.
- Third-Party Apps: If you have apps like Slack or Microsoft Teams installed, you can often share the file directly into a channel or conversation.
This simple flowchart can help you decide whether to tackle the transcription yourself or hand it off to a service.
As you can see, the path to a finished transcript is a lot faster when you let an AI service do the heavy lifting.
Picking the Best File Format
By default, Apple saves your Voice Memos as M4A (MPEG-4 Audio) files. This format is a great compromise, offering good audio quality without creating a massive file that’s a pain to share. For most transcription jobs, the standard M4A file will work perfectly and give you a great result with a quality AI service.
But what if your recording is a bit tricky? Think of audio with a lot of background chatter, people talking over each other, or really subtle dialogue. In those situations, audio quality is everything.
My Two Cents: While M4A is usually fine, I've found that a high-quality MP3 can sometimes give you an edge with really complex recordings. The goal is to preserve as much audio detail as you can—it gives the transcription AI a much cleaner signal to analyze.
If you think your recording could use a fidelity boost, you'll have to convert it after you export it from the Voice Memos app. It's an extra step, for sure, but it can make a real difference in the accuracy of your final transcript. To see how it's done, check out our guide on how to easily convert a voice memo to MP3. This little bit of prep work ensures you're starting with the best possible source file.
Step 2: Prep Your Audio for Flawless Transcription
Here’s a hard-won piece of advice: better audio means a better transcript. It’s the classic “garbage in, garbage out” problem. I can’t tell you how many times I've seen a few minutes of prep on the front end save an hour of painful editing on the back end. Giving the AI clean source material is the single most important thing you can do.
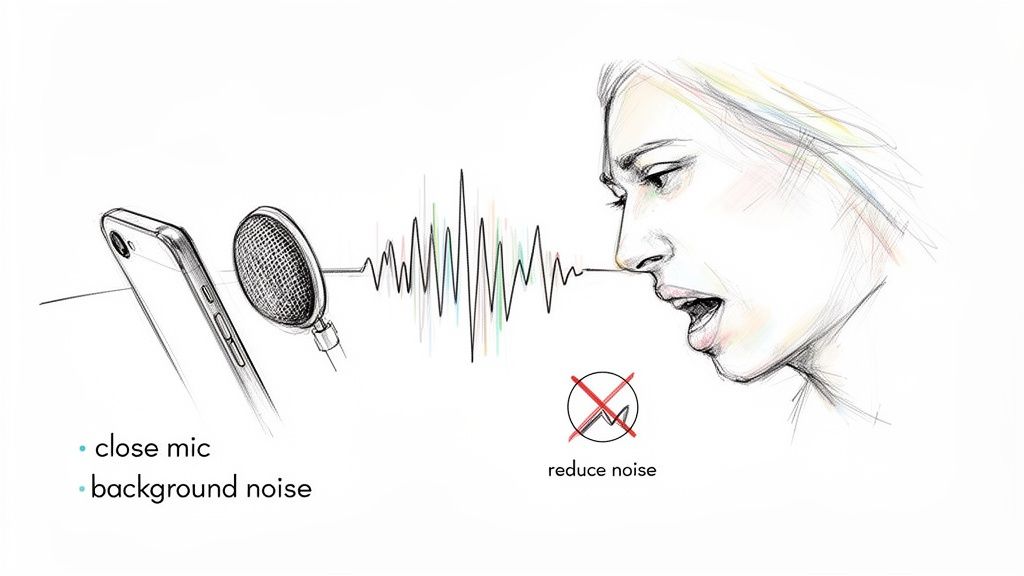
It all starts with how you record. The simplest trick in the book is to just get closer to your iPhone’s microphone. Think of it as a spotlight—the closer you are, the more it focuses on your voice and pushes everything else into the shadows.
This is especially critical when you're recording in noisy environments. To get the most accurate transcription from your voice memos, crystal-clear audio is non-negotiable. Learning how to reduce background noise is a skill that will pay off big time.
Proactive Recording Habits for Better Transcripts
The absolute best way to fix bad audio is to prevent it from happening in the first place. Trust me, I’ve learned from experience that a few small adjustments during the recording process make a world of difference later on.
- Mind the Gap: Try to stay a consistent 6-12 inches from your device. This simple step helps you avoid those harsh "plosive" sounds (puffs of air from words starting with 'p' or 'b') and keeps your volume nice and even.
- One Speaker at a Time: If you’re recording a conversation, do your best to prevent people from talking over each other. Transcription AI is impressive, but it gets easily confused when trying to untangle overlapping voices.
- Find a Quiet Space: This sounds obvious, but you’d be surprised what a microphone picks up. Even low-level hums from an air conditioner, a refrigerator, or distant traffic can muddy the recording. If possible, find a carpeted room with soft furniture to cut down on echo.
I once tried to transcribe a memo I’d recorded in a bustling coffee shop. The AI gave it a shot, but the transcript was a disaster—a jumble of clattering dishes and background chatter. A five-minute walk to a quiet park bench would have saved me nearly an hour of cleanup.
Cleaning Up Existing Recordings
But what if the recording is already in the can? Don't worry, you’re not out of luck. The Voice Memos app has a surprisingly effective tool built right in.
The Enhance Recording feature uses some clever algorithms to dial down background noise and echo. It’s incredibly easy to use:
- Open the voice memo you want to improve.
- Tap the three-dots menu (...) and choose Edit Recording.
- Tap the little magic wand icon in the top-left corner.
- Save your changes.
This one-tap fix can seriously sharpen the dialogue, making the audio much friendlier for a transcription service to process. For most situations, the default M4A format from your iPhone is perfectly fine. That said, file choice can matter. While MP3 still dominates the digital recorder market, holding a 47.4% revenue share because it works everywhere, uncompressed formats like WAV are gaining ground for professional work where every bit of accuracy counts.
Step 3: Transcribe Your Voice Memo with HypeScribe
Alright, you've got your audio file exported and ready to go. Now for the easy part—turning that recording into a clean, searchable transcript. This is where a specialized tool like HypeScribe really shines, doing the heavy lifting in minutes, not hours.
Getting your audio into the system couldn't be simpler. HypeScribe has a drag-and-drop uploader, which is always my preferred method. Just find that M4A or MP3 file on your computer and drag it right into the upload window on the dashboard.
Here’s a look at the dashboard—it’s clean, simple, and gets you right to the point.
You can see there are no unnecessary bells and whistles. The focus is purely on getting your file uploaded and transcribed without any friction.
Dialing in Your Transcription Settings
Once your file is uploaded, you have a couple of quick settings to configure. Think of this as giving the AI some basic instructions so it can deliver the best possible result.
- Pick the Language: This one is critical. HypeScribe can handle over 100 languages, but its accuracy depends on knowing which one to listen for. It's a simple dropdown, but double-check that you've selected the correct language spoken in your memo.
- Turn on Speaker Identification: If your recording has more than one person talking—like an interview or a team meeting—this feature is a lifesaver. Toggling it on tells the AI to distinguish between the different voices and label them (e.g., Speaker 1, Speaker 2). Trust me, this saves a massive amount of editing time later.
With those settings confirmed, you just hit the button to start the transcription. The speed is something you have to see to believe. An hour of audio is typically done in just a few minutes.
The real magic of a tool like HypeScribe isn't just the speech-to-text conversion. It’s the ability to add structure and context—like who is speaking—that turns a flat transcript into a genuinely useful record of a conversation.
HypeScribe AI vs Manual Transcription
Deciding between an AI service and a human transcriber often comes down to speed, cost, and features. Here’s a quick comparison to see why AI is the go-to choice for most voice memo transcriptions today.
FeatureHypeScribe (AI)Manual TranscriptionSpeedMinutes for an hour of audioHours or daysCostLow, often subscription-basedHigh, usually per-minuteSpeaker IDAutomated featureManual and time-consumingAvailability24/7, on-demandBusiness hours, subject to availabilityExtra FeaturesAI summaries, takeaways, action itemsNone, just the raw textAccuracy99%+, depending on audio qualityHigh, but prone to human error
For busy professionals who need to transcribe Apple voice memos quickly and affordably, the advantages of an AI-powered tool are clear. It's not just faster; it's smarter.
More Than Just a Transcript
Here’s where HypeScribe really pulls away from basic transcription tools. Once the AI is finished processing the audio, it doesn't just hand you a wall of text. It automatically analyzes the content to give you actionable insights.
Right alongside your full transcript, you'll find:
- A Smart Summary that boils the entire conversation down to its core ideas.
- A bulleted list of Key Takeaways that highlights the most critical points.
- A checklist of Action Items the AI identified from the discussion.
This means you can grasp the essence of an hour-long meeting in about 30 seconds. You don't have to sift through pages of dialogue to find what you need. If you’re curious about the tech that makes this possible, you can dive deeper into how an online audio to text converter works. These intelligent features are what make the transcript a launchpad for your next steps, not just a record of the past.
Step 4: Polish and Export Your Final Transcript
An AI transcription will get you 95% of the way there, but that last 5% is where the human touch really shines. This is the part of the process where you turn a good transcript into a flawless, professional document. My own workflow for this is all about speed—I aim to spend minutes on cleanup, not hours.
Even when you transcribe Apple voice memos with a top-tier tool, this final check is non-negotiable. You're not re-doing the work; you're just hunting for the little hiccups AI can stumble on, like specific industry jargon, unique names, or those moments where the audio got a bit muffled.
Editing Your Transcript Effectively
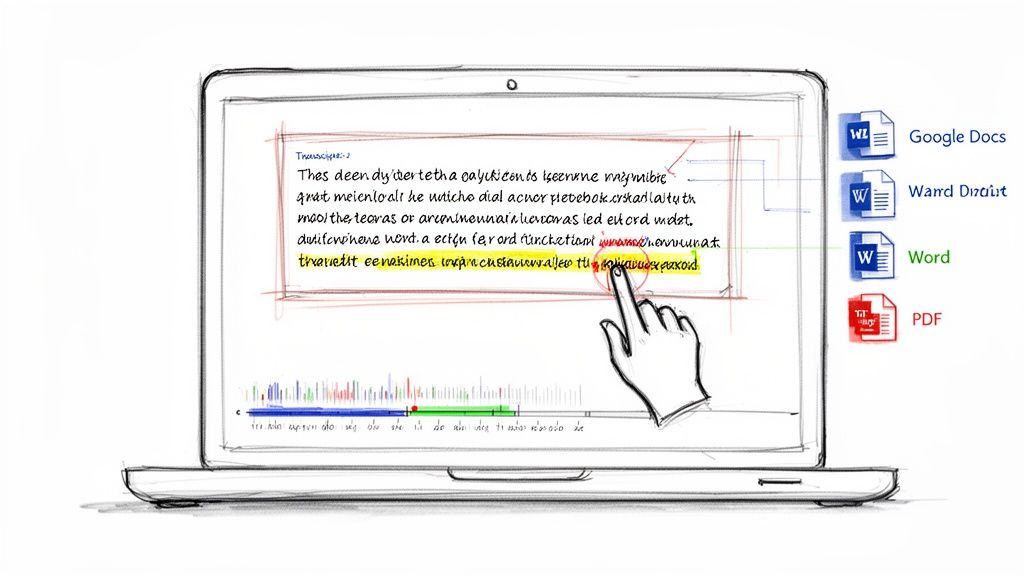
Most modern transcription services, including HypeScribe, come with an interactive editor built for this exact task. The single most powerful feature you'll find is synchronized audio playback. It's simple but brilliant: as you read the transcript, you can click on any word, and the audio instantly jumps to that precise spot in the recording.
Honestly, this one feature makes editing a breeze. No more frustratingly scrubbing back and forth through an audio file to find that one garbled phrase. You just click and listen.
Here’s the quick-and-dirty method I use for a final review:
- First, a quick scan. Read the text without playing the audio. Your brain is great at spotting obvious typos or sentences that just don't make sense on their own.
- Check the speaker labels. If you had multiple people talking over each other, the AI might have mixed them up. It's usually a simple fix, like reassigning a name from a dropdown menu.
- Use the audio sync for tricky spots. When a sentence feels a bit off, click it. Hearing the original audio immediately clears up any confusion and helps you fix those subtle mistakes.
I once transcribed an interview where the AI wrote "new art" when the speaker clearly said "Newark." With synchronized audio, I found and fixed that tiny but crucial error in less than five seconds. It's those little details that make the final transcript trustworthy.
Exporting Your Transcript for Any Use Case
Once you're satisfied with the text, the last step is to get it out of the editor and into a format you can actually use. The right choice here depends entirely on what you plan to do with the transcript next. Most platforms give you a few standard options, each suited for a different job.
Think about your end goal:
- For more editing or team collaboration: Microsoft Word (.docx) or Google Docs are your best friends. They keep all the formatting and are perfect if you need to add comments, track changes, or paste the text into a bigger report.
- For sharing a finished, read-only version: Go with PDF. This locks the document, creating a clean, professional file that anyone can open on any device without messing up the layout.
- For raw data or website content: The Plain Text (.txt) file is what you need. It strips out all formatting, leaving you with just the raw text—ideal for importing into a database, a content management system (CMS), or analysis software.
Choosing the right format from the start means your perfectly transcribed voice memo is ready for its next life, whether that's becoming meeting minutes, a new blog post, or an archived piece of research.
Common Questions About Transcribing Voice Memos
When you start thinking about transcribing your Apple voice memos, a few questions always seem to pop up. People often ask about Apple’s own features, the best file formats to use, and, of course, the security of uploading personal recordings.
Let's clear up some of the most common questions. Getting these answers will help you feel more confident as you turn your audio into text, making sure you get accurate results while keeping your data safe.
Can I Transcribe Directly in the Voice Memos App?
This is a big one, especially since Apple has started adding some basic transcription features. The short answer is yes, but it's pretty limited. The built-in function is really meant for a quick glance—maybe to search for a specific word you mentioned or get a very rough idea of the content.
It’s just not built for serious transcription work. For anyone needing more, it's worth checking out options like general-purpose audio transcription services like Otter.ai, which are often used for meetings and lectures. But for professional-grade results from your voice memos, a dedicated service delivers critical features the native app just doesn't have, such as:
- Speaker Identification: The ability to automatically tell you who is speaking and when.
- Advanced Editing: Tools that sync the text directly with the audio, making corrections a breeze.
- Multiple Export Formats: The flexibility to download your transcript as a Word doc, PDF, or plain text file.
So, while Apple's feature is a nice-to-have, it's not going to replace a specialized tool when you truly need accuracy and detailed output.
What Is the Best Audio Format for Accuracy?
Honestly, the default M4A file your iPhone records is usually more than good enough. This format strikes a great balance between audio quality and file size, and modern AI transcription services handle it without any issues.
What matters far more than the file type is the clarity of the original audio. A high-quality, uncompressed WAV file won’t give you a better transcript if the recording is full of coffee shop chatter, echoes, or multiple people talking at once. If you focus on getting a clean recording from the start, you'll see a much bigger improvement in accuracy than you would by changing file formats.
Here’s a simple rule I always follow: if a human would have trouble understanding the audio, an AI will too. Prioritize clear sound, and the file format becomes a minor detail.
How Secure Is Uploading My Voice Memos?
It’s completely normal to feel a bit hesitant about uploading personal or confidential recordings to an online service. The most important thing is to pick a provider that makes security a top priority.
You should look for a service that clearly advertises enterprise-grade encryption. This is a non-negotiable. It ensures your files are protected both while they're being uploaded (in transit) and when they're stored on the company's servers (at rest).
A trustworthy provider will also have a crystal-clear privacy policy that guarantees your data belongs to you and will never be used for anything other than creating your transcript. This gives you peace of mind that your sensitive client meetings, private interviews, and personal notes will stay completely confidential.
Ready to turn your recordings into accurate, actionable text? With HypeScribe, you get fast, secure, and intelligent transcription that creates summaries, takeaways, and action items in minutes. Try it for free and experience the difference at https://www.hypescribe.com.


