A Practical Guide to Recording a Teams Meeting
Ever had that sinking feeling when a critical meeting is underway and the "Start recording" button is grayed out? It's a classic Teams moment, and from my experience, it almost always boils down to one of two things: your permissions or your license.
Let's make sure that doesn't happen to you. Before you jump into your next important call, a quick check of your setup can save you a world of frustration. This guide is based on countless hours spent in Teams, and I'll walk you through everything you need to know.
Who Can Hit the Record Button?
In any given Teams meeting, not just anyone can start or stop a recording. That power is reserved for a select few, and understanding who holds it is the first step.
You must be either the meeting organizer or a presenter from the same organization. If you're joining as an attendee or as a guest from outside the company, you simply won't have the option. Microsoft designed it this way to keep control in the hands of the people running the show.
This little decision tree breaks it down perfectly.
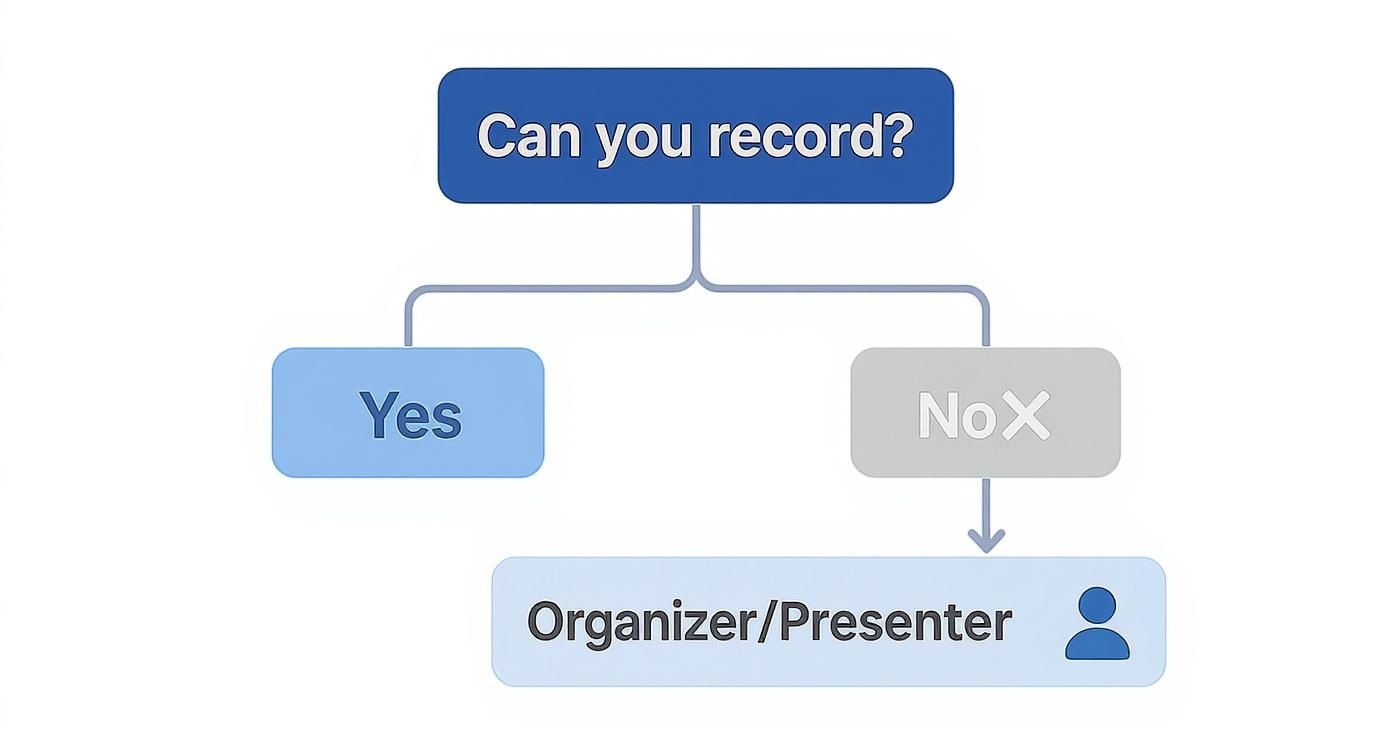
Ultimately, your role in that specific meeting is the first and most important gatekeeper for whether you can record.
Check Your License and Company Policies
Even if you're the meeting organizer, your Microsoft 365 license is the next hurdle. Recording isn't a free-for-all feature; it's part of the premium business and enterprise plans. You'll typically need one of these:
- Microsoft 365 Business (Standard or Premium)
- Office 365 Enterprise (E1, E3, E5)
- Educational licenses (A1, A3, A5)
If you're on a more basic plan, you're likely out of luck.
What if you do have the right role and the right license, but still can't record? The culprit is probably your organization's internal IT policies. A Teams administrator has the power to disable meeting recordings for everyone, or even just for specific groups of users, right from the Teams admin center.
My Go-To Workaround: If you're in a pinch and the record button is disabled, don't panic. The quickest fix is to send a quick message to the meeting organizer or another presenter and ask them to start the recording for you. It's a simple, immediate solution when you're caught out by permissions.
In larger companies, especially in regulated industries, admins lock these settings down for good reason—compliance and security. They're often tasked with ensuring every meeting adheres to strict data handling rules. This is also why they can pull detailed attendance metrics to support compliance, tracking who was there and when. It’s a level of oversight that's absolutely essential when accountability is on the line.
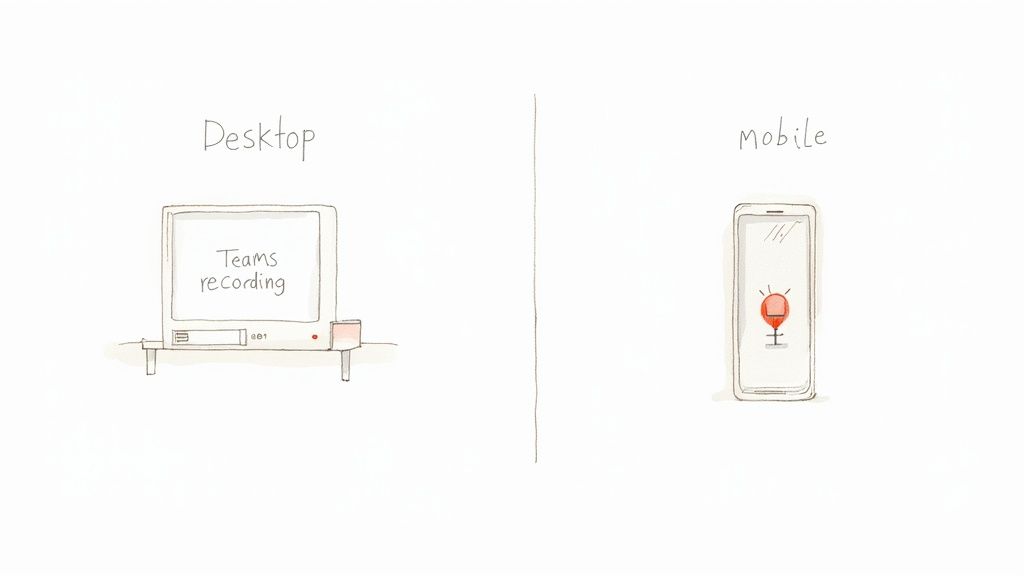
Recording a Teams Meeting on Any Device
Capturing your discussion should be simple, whether you're at your desk or joining a call on the go. The process to record a Teams meeting is a little different depending on your device, but the core steps are straightforward once you know where to look. Let's walk through exactly how to do it on both desktop and mobile.
Most of the time, you'll probably be recording from your desk during a client presentation or a detailed project sync. Thankfully, the desktop experience on both Windows and macOS is nearly identical, designed for quick access without interrupting your meeting flow.
This just shows how recording is a central function right alongside other key actions. To find it, you just need to pop open the meeting controls.
Initiating a Recording on Desktop
Once your meeting has started, find the main control bar—it usually floats at the top of your screen. From there, look for the "More" option, which is always represented by three dots (...).
Clicking this "More" icon opens up a menu with several actions. Near the top of this list, you’ll find Start recording. Give that a click, and Teams will immediately begin capturing everything—audio, video, and any screen-sharing activity. A banner will pop up for every participant, letting them know the meeting is now being recorded.
When you're ready to stop, you just retrace your steps.
- Head back to the More (...) menu in your meeting controls.
- Select Stop recording.
- A little confirmation box will appear; click Stop recording again to finalize it.
That two-step confirmation is a nice touch, as it prevents you from accidentally cutting the recording short. Once you stop it, the video will process for a bit and then appear in the meeting chat or the channel conversation.
Just a heads-up: whoever starts the recording is considered the "owner." This means the file gets saved to their OneDrive or SharePoint, and they'll have the initial control over permissions and sharing.
Starting a Recording from Your Phone
What about when you’re not at your computer? Maybe you’re joining a quick team huddle while commuting or need to capture a conversation while out in the field. Recording from the Teams mobile app on iOS or Android is just as easy.
The interface is obviously slimmed down for a smaller screen, but the steps are very similar.
- Access Meeting Options: During the call, just tap your screen to bring up the control bar. Look for that same three-dots (...) icon.
- Start the Recording: Tapping the dots reveals a menu. From there, select Start recording. Everyone will get the same notification banner as they would on desktop.
- Stop the Recording: To end it, just go back into the same menu (...) and tap Stop recording.
The mobile option is perfect for those impromptu discussions where you want a record without being chained to your laptop. While the desktop app offers a more feature-rich experience, knowing how to record on your phone ensures you never miss capturing important info.
For those who regularly record and manage meetings, looking into a more advanced app for recording meetings can unlock even more powerful features and flexibility.
How to Manage and Share Your Recordings
So you’ve hit "Stop." Now what? A raw video file of your meeting is a great start, but it’s only useful if you know where to find it, who can see it, and how to get it to the right people. What happens next—from cloud storage to permissions—is just as important as hitting the record button in the first place.
The first question I always get is: where did my recording go? Microsoft handles this automatically, but the destination isn't always obvious. It all depends on the type of meeting you just ran. Getting this right saves you from digging through endless folders later.
Finding Your Saved Recordings
Fortunately, Teams doesn't just toss your videos into a random digital drawer. The storage location is actually pretty logical once you understand the system.
- For standard or private meetings, the recording lands in a "Recordings" folder inside the OneDrive account of whoever started the recording. Simple enough.
- For channel meetings, the video is saved to the channel's "Files" tab. Behind the scenes, this is all stored on the team's dedicated SharePoint site.
This setup is designed to keep everything organized. Channel recordings are instantly available to everyone on that team, while private meeting recordings are locked down to just the attendees and the person who recorded them.
Teams Meeting Recording Storage Locations
To make it crystal clear, here’s a quick breakdown of where your recordings live based on the meeting type.
Meeting TypeDefault Storage LocationWho Has Access by DefaultStandard/Private Meeting"Recordings" folder in the recorder's OneDriveThe meeting attendees and the recorderChannel Meeting"Files" tab of the specific Teams channel (in SharePoint)All members of that Teams channelOne-to-One Call"Recordings" folder in the recorder's OneDriveOnly the two people on the call
Understanding these default locations is the key to managing your recordings efficiently from the get-go.
Managing Access and Permissions
By default, anyone invited to the meeting can watch the recording. But what happens when you need to share it with a colleague who missed out, or maybe you need to lock down a sensitive discussion? You're in full control.
Just like any other file in the Microsoft 365 world, you can manage permissions directly from OneDrive or SharePoint. Find the video file, open its details, and you can generate a shareable link, grant view-only access, or even allow others to download it.
Expert Tip: Set an expiration date on your recordings to avoid digital clutter. Your Teams admin can set a default policy (say, 90 days), but you can override this for individual recordings. I often extend the life of important training videos while letting routine check-ins expire quickly.
Sharing and Downloading Your Video
Getting your recording into someone else's hands is as easy as sending a link. When you open the video from the meeting chat, OneDrive, or SharePoint, you'll see a prominent "Share" button.
Here are a few pointers for sharing effectively:
- Share with specific people: For better security, always try to share the link directly with the email addresses of the intended viewers. This prevents the link from being forwarded to people who shouldn't see it.
- Use the "Copy Link" feature: This gives you a URL to paste anywhere—email, Slack, a project management ticket. Just be sure to double-check the permissions on that link before you send it.
- Download for offline use: You can also download the MP4 file directly. This is my go-to when I need to archive something long-term or upload the video to another platform like a company training portal or YouTube.
When you manage these files properly, a simple recording transforms into a powerful tool for communication and knowledge sharing. To really unlock their full potential, you can learn more about how to record and transcribe meetings and turn your videos into searchable, actionable resources.
Getting More Value from Your Recordings
Let's be honest, nobody wants to re-watch an hour-long meeting recording. The real gold isn't in the video file itself; it's buried inside—in the decisions made, the action items assigned, and the key insights shared. The trick is to pull that value out quickly, and that starts with turning spoken words into searchable text.

Simply having a video archive isn't enough. You need to make that content useful. Microsoft Teams has some solid built-in features to help you do just that, and other AI tools can take your meeting follow-up to a whole new level.
Using Native Teams Transcription
Microsoft Teams has a handy live transcription feature that can run right alongside your recording. When you hit record, you can also start the transcription. As people speak, a time-stamped, speaker-attributed transcript appears in a side panel. It's a game-changer for accessibility and review.
Once the meeting ends, that transcript is saved right there with the video. No more scrubbing through the timeline trying to find where someone mentioned "the Q3 budget." You just search the transcript for the keyword and jump right to that moment. It's an incredible time-saver.
A recording proves what was said, but a transcript makes that information usable. It transforms a passive video file into an active, searchable database of your team's conversations and decisions.
Beyond the transcript, you can also see who was there and how engaged they were. Teams generates attendance reports showing who joined, when they left, and how they interacted. If you have a Teams Premium license, the data gets even richer. You can check out all the details on these powerful meeting analytics from Microsoft.
Supercharge Your Notes with AI Tools
While the native transcription is a great start, specialized AI platforms are built from the ground up to squeeze every drop of value from your meetings. Tools like HypeScribe go way beyond simple transcription—they analyze the conversation to give you actionable insights in minutes.
Picture this: you hang up from a call, and before you've even had a chance to grab a coffee, an email lands in your inbox containing:
- A clean, highly accurate transcript.
- A quick, digestible summary of the entire meeting.
- A bulleted list of all the key decisions.
- An organized list of action items, complete with who they were assigned to.
That’s what a dedicated AI meeting note taker can do. Forget spending the next half hour trying to piece together your notes and write a follow-up email. The AI handles it, freeing you up to actually work on the next steps.
While recording your Teams meeting is the first step, a voice recorder with transcription app can automatically turn your spoken words into written notes, adding significant value. These tools effectively eliminate the tedious task of manual note-taking and ensure nothing important gets lost. By automating this process, your team can move from discussion to execution faster than ever before.
Solving Common Teams Recording Problems
You’ve done everything right, but technology doesn't always play fair. When you’re trying to record a Teams meeting, a few common gremlins can pop up. The good news is that most of these issues are surprisingly easy to fix once you know where to look.
One of the most frequent frustrations I hear about is the infamous grayed-out "Start recording" button. We've already covered permissions, but if you've confirmed that's all in order, the issue is often much simpler: you're in a one-on-one call. Teams won't let you record a simple call between two people. The recording option only becomes available once you add a third person or an app, officially turning it into a group call.
Another classic problem is a recording that just fails to process or save after the meeting. This almost always comes down to storage. If the recorder's OneDrive is full, or the channel's SharePoint site is maxed out, the video file has nowhere to land. It's a good habit to check your available cloud storage before kicking off a long recording session.
When Your Recording Quality Suffers
Nothing's worse than a recording that's too choppy or garbled to be useful. This is almost always a network problem, not an issue with Teams itself. A spotty Wi-Fi signal or limited bandwidth is the usual suspect, leading to pixelated video, audio dropouts, and frustrating lag.
If you find yourself in this situation, here are a few things to try:
- Go Wired: An Ethernet cable will always give you a more stable and reliable connection than Wi-Fi. It’s my go-to for any important call.
- Free Up Bandwidth: Close down other programs that might be hogging your connection. Think streaming services, cloud backups, or large file downloads running in the background.
- Kill Your Camera: If you don't need to be on screen, turn off your video. This can free up a surprising amount of bandwidth and lead to a much cleaner audio recording for everyone.
And if your audio is the main problem, a great skill to learn is how to remove background noise from your recordings. This can be a lifesaver for cleaning up distracting sounds and making the audio usable.
Pro Tip: Don't panic if a recording seems to have vanished. Before you assume the worst, check the meeting chat or the channel's conversation thread. If it's not there, go directly to the "Recordings" folder in your OneDrive or the "Files" tab in SharePoint. Sometimes the link just doesn't post correctly.
Understanding Recording Data and Analytics
Sometimes the issue isn't with the recording file, but with trying to get a handle on meeting activity itself. Tracking things like total meeting counts and attendance has become a real operational challenge for many managers. The reason is that Teams channels don't push this data directly into Teams Analytics.
Instead, that kind of meeting data is typically pulled from calendar integrations or individual attendance reports, which don't give you a simple, aggregated count. It’s a crucial distinction for anyone who needs a high-level overview of team engagement and activity.
Answering Your Top Questions About Teams Recordings
As you get more comfortable recording meetings in Teams, a few common questions tend to pop up. Let's tackle some of the most frequent ones I hear, so you can handle these situations like a pro without digging through technical manuals.
How Long Can a Teams Meeting Recording Be?
You've got a 4-hour limit for any single recording. If you're running a marathon all-day workshop, keep an eye on the clock. Once it hits the four-hour mark, the recording stops automatically.
To keep capturing everything, you'll need to jump in and start a new recording yourself. Also, remember that a long recording means a big file. These files eat up your OneDrive or SharePoint storage, so it’s smart to check your available space before kicking off a lengthy session.
Who Gets Notified When I Start Recording?
Teams is big on transparency here, and for good reason. As soon as you hit Start recording, everyone in the meeting gets a banner notification at the top of their screen. This includes guests, internal staff, and anyone who joins late—no exceptions.
This notification is a built-in privacy feature and you can't turn it off. It’s designed to make sure everyone knows they’re being recorded, which is a big deal for complying with privacy laws like GDPR.
On top of the banner, a note also pops into the meeting chat log, timestamping when the recording began. It’s a nice, clean way to keep a record of what happened and when.
Why Did My Recording Disappear?
It’s a frustrating moment: you go to find a recording and it’s just… gone. The most likely reason is your organization's expiration policy. IT admins often set recordings to automatically delete after a certain time—60 or 90 days is pretty standard—to keep storage costs down.
If you can't find a video, your first stop should be the meeting's chat history or the "Recordings" folder in your OneDrive. If it's not there, it was probably wiped out by that policy. Pro tip: If you get to the file before it expires, you can usually extend the expiration date yourself.
Can I Record a Breakout Room in Teams?
Absolutely, but with a catch. Each breakout room acts like its own separate meeting. That means the main meeting recording does not follow you into a breakout session.
If you need to capture what's happening in a breakout room, someone inside that room with presenter rights has to start a new recording. That recording is then saved separately and is only available to the people who were in that specific breakout room. It's perfect for when you want to document smaller group discussions without flooding the main recording.
Stop letting your meeting recordings just sit there. With HypeScribe, you can turn those video files into searchable notes, accurate transcripts, and clear summaries. Skip the re-watching and get straight to the insights. Learn more about HypeScribe.


