Mastering Premiere Pro Subtitles: The Complete Guide for 2026
If you're making videos today, you're not just an editor—you're a storyteller. And one of your most powerful tools for telling that story, especially in a world of silent autoplays and diverse audiences, is Premiere Pro subtitles.
The great news is that adding captions in Premiere Pro has gotten incredibly efficient. You can generate them, style them for maximum impact, and export them perfectly for any platform, all without ever leaving your project.
Why Mastering Subtitles Is Crucial for Modern Video
Let's be real: subtitles are no longer an afterthought. They’ve gone from a simple accessibility feature to a non-negotiable part of any solid video strategy. From quick social media clips to in-depth online courses, viewers have come to expect captions. To get the full picture, it's worth understanding the power of video marketing in the digital age.
Think about your own scrolling habits. On platforms like Instagram or Facebook, videos often start playing on mute. Without captions, your message is completely silent and, frankly, ineffective. Well-timed subtitles grab attention from the first second, ensuring your story gets told even when the sound is off.
Expanding Your Reach and Accessibility
Beyond the silent scrollers, subtitles open your work up to a much wider world. They're essential for making your content accessible to viewers who are deaf or hard of hearing, which is a cornerstone of inclusive creation.
Plus, they're a huge help for non-native speakers trying to follow along, effectively breaking down language barriers and taking your content global.
This isn't just a niche trend; it's a massive industry shift. The global AI subtitle generation market was valued at USD 1.03 billion in 2023 and is on track to hit a staggering USD 7.42 billion by 2032. This explosion in value shows just how central automated captioning has become. You can dive deeper into the latest subtitle generation trends to see where things are headed.
Choosing Your Premiere Pro Subtitle Workflow
Getting comfortable with captions in Premiere Pro gives you a serious advantage, both creatively and commercially. I’m going to walk you through the three main workflows I use, each tailored for different project goals and deadlines.
Before we dive in, let’s quickly compare these methods.
Premiere Pro Subtitle Methods at a Glance
.tbl-scroll{contain:inline-size;overflow-x:auto;-webkit-overflow-scrolling:touch}.tbl-scroll table{min-width:600px;width:100%;border-collapse:collapse;margin-bottom:20px}.tbl-scroll th{border:1px solid #ddd;padding:8px;text-align:left;background-color:#f2f2f2;white-space:nowrap}.tbl-scroll td{border:1px solid #ddd;padding:8px;text-align:left}MethodBest ForSpeedControlPremiere's Auto-TranscribeQuick turnaround social clips, interviews, draftsFastestGoodImporting an SRT FileOutsourced transcription, multi-language projectsFast (if file is ready)VariesManual CaptioningShort, artistic videos, absolute precisionSlowestMaximum
This table gives you a quick snapshot, but the real magic is knowing why you’d pick one over the other based on the job at hand.
This flowchart can also help you decide which path to take based on what matters most for your specific project.

The key is to match your workflow to your goal, whether that's speed, creative control, or pinpoint accuracy. It also helps to know the basics of what makes up a caption file; you can learn more about what is a subtitle in our detailed guide.
By the end of this guide, you won't just know the "how-to" steps. You'll have the confidence to choose the right method for any situation, turning a technical task into a strategic part of making your videos more engaging and successful.
Using Premiere Pro’s Built-In AI for Automatic Captions
One of the most powerful time-savers Adobe has baked into Premiere Pro is its native Speech to Text engine. When speed is the name of the game—like for social media clips or just getting a rough cut of an interview transcribed—this is my go-to tool. It keeps the entire workflow inside one application, which is a massive win for efficiency.
Adobe has really leaned into these AI-driven features, and it’s easy to see why. The ability to automatically generate a transcript and captions is fundamentally changing how editors approach their work, especially with the modern demand for accessible, multi-platform content.
Getting Started with Transcription
Kicking off a transcription is surprisingly simple. The whole process is housed in the Text panel, which you can pull up by navigating to Window > Text. Once that panel is open, you’ll find a tab labeled "Transcript."
This is your mission control for creating captions. But before you click that big "Transcribe" button, let me share a tip I learned the hard way.
You have to prep your audio. If you feed the AI a messy audio mix with loud music, distracting background noise, and muffled dialogue, you're going to get a garbled, useless transcript. I always take a few minutes to do a quick audio pass, isolating and boosting the dialogue while ducking music and effects. Clean audio is the single most important factor for getting an accurate result.
With your audio nice and clean, go ahead and click "Transcribe." Premiere will give you a few options to configure:
- Audio Analysis: You can have it analyze your entire timeline or just a specific section you’ve marked with in and out points.
- Language: Make sure to select the correct language spoken in the video. Accuracy hinges on this setting.
- Speaker Labeling: If your video has multiple speakers, you can tell Premiere to try and identify them. It does a decent job, but you’ll almost certainly have to go in and manually correct the speaker names later.
Once you’ve made your selections, Premiere Pro gets to work, analyzing the audio and dropping a full text transcript right back into that Text panel.
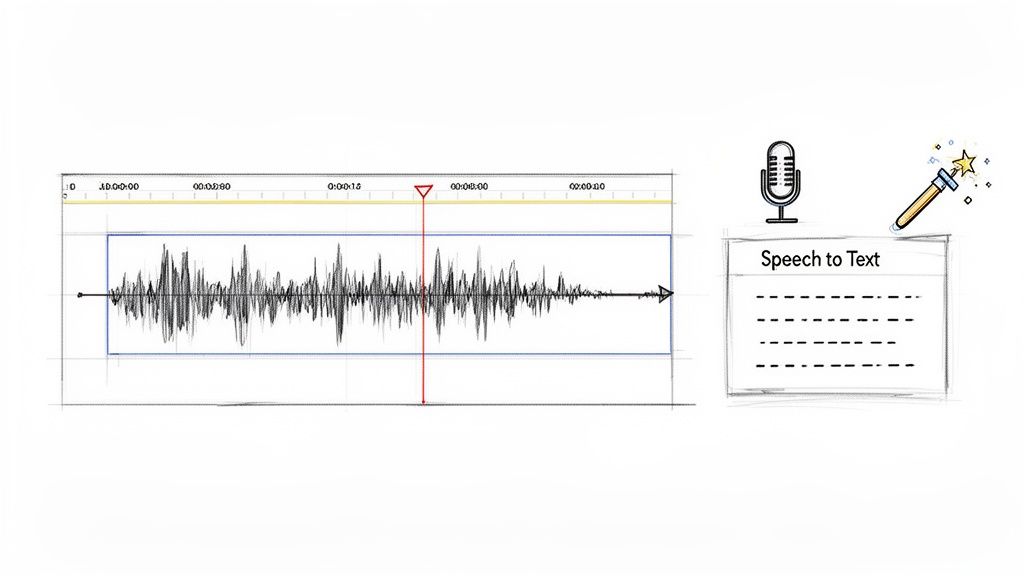
As you can see, the panel gives you a time-stamped transcript that’s directly linked to your timeline. This is what makes the tool so useful—the text and video are always in sync.
Cleaning Up and Correcting the Transcript
Let's be clear: no AI is perfect. You will absolutely have to proofread the transcript for errors. This is a non-negotiable step in the process. I often see misspelled names, butchered industry jargon, or words that were misheard because of an accent or someone mumbling.
The good news is that editing is a breeze. Just double-click on any word in the transcript and start typing to correct it. A real time-saver is the "Find and Replace" tool, hidden behind the three-dot menu in the Transcript panel. If a product name is wrong throughout the entire video, you can fix every single instance in one shot.
While the AI is fast, it's just a machine. It's helpful to understand the fundamental differences between machine and human translation to keep your expectations in check regarding accuracy. You can also explore our guide on choosing the right AI-powered transcription software to see how different tools stack up.
Generating Captions from Your Transcript
Once you're happy with the transcript's accuracy, turning it into captions on your timeline is literally a one-click affair. Look for the "Create captions" button (it's a little "CC" icon) at the top of the Text panel.
Clicking it opens the "Create Captions" dialog box, where you can dial in some crucial settings for how your subtitles will behave.
- Caption Preset: Just stick with "Subtitle" for standard, on-screen text.
- Style: If you have preset styles for your text, you can apply one here. We’ll get into creating those later on.
- Maximum Length in Characters: This one is critical for readability. I generally aim for 42 characters per line to keep things neat and easy to read.
- Minimum Duration in Seconds: This stops captions from just flashing on screen. A value between 1.5 and 2.0 seconds is a good, safe floor.
- Gap Between Captions: I usually set this to 1 or 2 frames. It creates a tiny, almost unnoticeable pause between captions that helps the viewer's brain register the change.
- Lines: You can choose "Single" or "Double." Double is the standard for most video content.
After you hit "Create," Premiere Pro will generate a brand new caption track on your timeline, with all the text perfectly timed to the dialogue. Just like that, you have a full set of editable Premiere Pro subtitles ready for styling.
The Pro Workflow: Importing and Using SRT Files
While Premiere Pro's auto-transcribe feature is a lifesaver for quick turnarounds, the SRT import workflow is what the pros use when things have to be perfect. For projects demanding maximum accuracy, collaboration, or multilingual versions, this method gives you total control before your captions ever hit the timeline.
This approach neatly separates transcription from video editing. By doing this, you can pass the transcription task off to a specialized service or team member, or use a more powerful, dedicated AI tool to get a near-perfect result right from the start.
Understanding the Power of SRT Files
So, what exactly is an SRT file? The name stands for "SubRip Subtitle," and it's basically just a plain text document containing your subtitle data in a specific, universal format. Each entry has a number, a start and end timecode, and the subtitle text itself.
Think of it as the common language for subtitles. It’s a simple, lightweight format that works with virtually every video player and editing software out there, including Premiere Pro. This is why it’s the standard for professional captioning and translation services. If you want a deeper dive into the technical details, our guide on what SRT files are is a fantastic resource.
The real beauty of the SRT format is its independence. Because it exists outside your Premiere project, it can be edited, shared, and proofread by anyone using a simple text editor like Notepad or TextEdit.
Generating a Hyper-Accurate SRT with HypeScribe
While you could hire a human transcriptionist for your SRT, a much more efficient route for many projects is a dedicated AI transcription tool. Services like our own, HypeScribe, are built from the ground up for one job: turning audio into incredibly accurate text.
This focused approach often produces much better results than the all-in-one features built into editing software. For example, a dedicated service can offer:
- Higher Accuracy: With specialized AI models, you can get up to 99% accuracy, which drastically cuts down on proofreading time.
- Superior Speaker Identification: These tools are often better at distinguishing between multiple speakers and labeling them correctly from the get-go.
- Faster Processing: Services like HypeScribe can transcribe an hour of audio in under 30 seconds, a speed that keeps your project moving forward without delay.
The process is simple. You upload your final video or just the audio file to the service, and within moments, you get a full transcript. From there, you can export it as a polished SRT file, complete with accurate timecodes, ready for import.
The Most Important Step: Proofread Before You Import
Here’s a pro tip that has saved me countless hours of headaches: always proofread your transcript before importing it into Premiere Pro. It is so much easier to fix text in a simple document or a web editor than it is to fiddle with individual caption clips on a crowded timeline.
When I'm working on a client project, I export the transcript as a Word or Google Doc first. This lets me use powerful spell-check and grammar tools. Even better, I can share this document with the client for their review and approval. Once they sign off on the text, I know the content is 100% correct before I create a single caption in Premiere.
This "text-first" approach separates proofreading (checking spelling, grammar, accuracy) from timing (adjusting when captions appear). Trying to do both at once inside Premiere is a recipe for tedious, painstaking work. Correcting the source SRT file is always more efficient.
Importing Your Polished SRT into Premiere Pro
Once your SRT file is proofread and perfect, bringing it into Premiere is the easiest part. You can do this in a couple of ways, but I find the most direct is using the "Import" command.
- Go to
File > Importor just use the keyboard shortcutCtrl+I(Windows) orCmd+I(Mac). - Find your
.srtfile on your computer and select it. - Click "Import."
Premiere Pro will automatically create a new caption track on your timeline (labeled C1, C2, etc.) and lay out all the subtitles according to the timecodes in your SRT file.
You'll see a series of clips on this new track, each one representing an individual subtitle. Clicking on one lets you see the text in the Text panel. Because you did the hard work of proofreading beforehand, any changes you make here should be minor timing tweaks, not major text rewrites. That's the SRT workflow paying off.
Styling Your Captions for Brand and Readability
Okay, your captions are transcribed and perfectly synced on the timeline. Now comes the fun part: making them look good. We need to move beyond Premiere’s default look and create something that feels professional and on-brand.
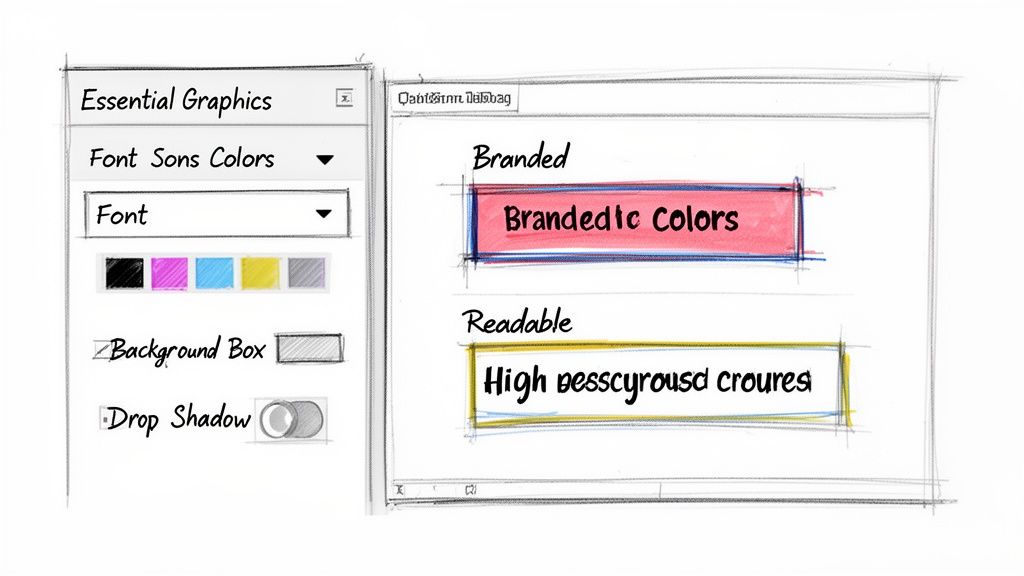
Everything we need is in the Essential Graphics panel. This is your control center for styling all Premiere Pro subtitles. The default white text in a gray box is functional, sure, but it rarely matches a project's aesthetic. Taking a few minutes to customize your captions makes them a seamless part of your video, not a distracting afterthought.
Navigating the Essential Graphics Panel
First things first, click on any caption clip in your timeline. This will bring up all the styling options under the "Edit" tab in the Essential Graphics panel. If you don't see the panel, just go up to Window > Essential Graphics to open it up.
You'll find a whole host of settings here, but let's focus on the ones that matter most for creating clean, readable captions.
- Text & Font Selection: This is where you start. I always recommend picking a clean, highly legible font. Think Arial, Helvetica, or Open Sans. You want to avoid fancy script or overly stylized fonts—they might look cool, but they’re a nightmare to read on a small phone screen.
- Size and Alignment: The font size needs to be big enough for comfortable mobile viewing but not so large that it covers up important parts of your video. I usually start with a size of 60 and then tweak it from there. For alignment, center is the standard and usually the safest bet.
- Fill and Stroke: "Fill" is just the color of your text. White is king for a reason, but you can use a brand color if there's enough contrast. A thin "Stroke" (an outline) can make text pop, but go easy on it. Too much can look a bit amateurish.
These settings will get you most of the way there, but to make your captions truly bulletproof, you need to handle the background.
Ensuring Readability Against Any Background
One of the most common mistakes I see is white text sitting directly over a bright or busy part of the video. The captions instantly become impossible to read, which defeats their whole purpose. You have to create some separation.
The Essential Graphics panel gives you two excellent tools for this:
- Background: This adds a color block behind your text. My go-to method is to use a black background with its opacity dropped to about 70-80%. This creates a slick, semi-transparent bar that makes the text easy to read without totally blocking the video underneath.
- Shadow: A drop shadow is a more subtle approach. A soft, dark shadow can work wonders for lifting the text off the screen. Just be sure to avoid hard-edged, offset shadows, which can look dated. I tend to crank up the softness and keep the distance minimal.
Honestly, I almost always go with the semi-transparent background. It's the most reliable way to make sure your subtitles are readable 100% of the time, whether they’re over a bright sky or a dark scene.
Creating and Saving Style Presets for Consistency
Once you’ve dialed in that perfect look—you've got the font, size, color, and background just right—you absolutely do not want to do it all over again for your next video. This is where presets become a massive time-saver.
With one of your styled caption clips selected, find the "Track Style" section in the Essential Graphics panel and click "Create Style." Give it a memorable name like "My Brand Captions - Black BG" and click OK.
Just like that, you have a saved preset. Now you can apply that exact style to every other caption on your timeline in a single click, guaranteeing perfect consistency. Better yet, that style will be waiting for you in all future projects. This simple step turns a tedious design task into a one-second click, making it one of the most powerful tricks for anyone who regularly creates Premiere Pro subtitles.
Exporting Your Video with Burned-In vs Sidecar Captions

You’ve styled and timed your captions, and everything looks perfect on the timeline. Now comes the final, crucial decision: how to export them. This isn’t just a technical checkbox; it’s a strategic choice that directly impacts how people will see and interact with your video.
Your decision boils down to two paths. You can either permanently "burn" the subtitles into the video frames, creating what we call open captions. Or, you can export them as a separate sidecar file, which allows for closed captions (the familiar CC button). The right choice almost always depends on where your video is going to live.
When to Use Burned-In Captions
Burned-in captions are baked directly into your video file. They are always on, and the viewer can't turn them off. For fast-paced social media platforms where videos autoplay on mute, this isn't just a good idea—it's the only way to go.
Think about Instagram Reels, TikTok, and Facebook feeds. Your video has seconds to grab attention without sound. If your captions aren't burned in, you're invisible to the 85% of Facebook users who watch videos silently. On these platforms, subtitles are a core part of the visual creative, not just an accessibility feature.
Exporting with burned-in captions from Premiere Pro is straightforward:
- Open the Export window (
Ctrl+Mon Windows orCmd+Mon Mac). - Find the Captions tab in the export settings.
- Under “Export Options,” just select Burn Captions Into Video.
That’s all it takes. Premiere will render your styled text directly into the video, ensuring it looks exactly as you designed it, on any phone or browser. It’s the ultimate WYSIWYG approach.
For any content destined for a social feed, I always burn in the captions. It's the only way to guarantee your hook lands in that crucial silent autoplay. It's the difference between a scroll and a view.
Leveraging Sidecar SRT Files for Platforms
On the flip side, we have sidecar files. A sidecar is a separate, lightweight text file—usually an .SRT file—that you upload alongside your video. This is the standard for platforms like YouTube and Vimeo, and it's what enables the Closed Captions (CC) button.
The real power here is discoverability. When you upload an SRT file to YouTube, its algorithm indexes every single word. This dramatically boosts your video's SEO, helping it show up for a much wider range of search queries. You’re essentially giving the platform a full, time-stamped transcript of your content.
Here’s how to create a sidecar file in Premiere:
- Head back to the Export window and select the Captions tab.
- This time, choose Create Sidecar File under “Export Options.”
- Make sure the File Format is set to SubRip Subtitle Format (.srt).
Premiere will then export two files: your final video and a separate .srt file with the exact same name, ready for upload.
This method is also your gateway to a global audience. You can provide multiple SRT files for different languages (English, Spanish, French, etc.), and viewers can pick the one they need. Adobe is making this even easier with new AI tools that can auto-translate captions into 27 languages, a huge time-saver.
Choosing Your Subtitle Export Format
So, which format is right for you? It all comes down to your distribution plan. There isn't one "best" method, only the best method for a specific platform and audience.
This table should help you decide at a glance.
.tbl-scroll{contain:inline-size;overflow-x:auto;-webkit-overflow-scrolling:touch}.tbl-scroll table{min-width:600px;width:100%;border-collapse:collapse;margin-bottom:20px}.tbl-scroll th{border:1px solid #ddd;padding:8px;text-align:left;background-color:#f2f2f2;white-space:nowrap}.tbl-scroll td{border:1px solid #ddd;padding:8px;text-align:left}Export TypeDescriptionBest ForProsConsBurned-In (Open)Captions are rendered into the video image and are always visible.Instagram, TikTok, Facebook, Twitter (X)Consistent styling; works on all platforms; great for silent autoplay.Viewer cannot disable; less accessible for screen readers.Sidecar File (Closed)A separate .srt text file is uploaded with the video.YouTube, Vimeo, course platforms, broadcastViewer control (on/off); improves SEO; allows multiple languages.Can be disabled by viewer; styling is controlled by the platform, not you.
Honestly, for many of my projects, I end up exporting both. I’ll render one master version with the captions burned in for all my social cuts, and then export a clean version with a companion .srt file for YouTube. It's a little extra work, but it ensures my video performs its best everywhere it lives.
Your Premiere Pro Subtitle Questions, Answered
Even when you have a solid workflow, captioning in Premiere Pro can throw you a curveball. Here are some quick answers to the most common questions and roadblocks I see editors run into all the time.
How Can I Fix Transcription Errors in Premiere Pro Quickly?
For recurring mistakes, your best friend is the "Find and Replace" tool. I use this constantly for misspelled names or jargon that the AI gets wrong every time. You'll find it in the Text panel under the "Transcript" tab's three-dot menu. It's a massive time-saver.
If it’s just a one-off typo, don't bother with menus. Simply double-click the word right in the transcript, type your fix, and you're done. The text updates immediately, no fuss.
Can I Have Multiple Subtitle Tracks for Different Languages?
Absolutely. This is essential for any project aiming for a global reach. Premiere lets you stack multiple caption tracks right on your timeline.
You can import separate SRT files for each language—say, English on track C1, Spanish on C2, French on C3, and so on. A newer AI feature inside Premiere can even auto-translate captions into over 27 languages, which has made this process incredibly fast. When it's time to export, you just tell Premiere which language to burn in or which ones to export as separate sidecar files.
Why Are My Captions Not Showing Up After Export?
We’ve all been there: you spend ages perfecting your subtitles only for them to vanish in the final video. Nine times out of ten, the culprit is a simple checkbox in your export settings.
- For Burned-In Captions: If you want the text permanently on the video, you have to select "Burn Captions Into Video" in the "Captions" tab of the Export window. If you miss this, they won't be there.
- For Sidecar Files: If you exported a sidecar file (like a
.srt), remember it's a separate file. You need to upload that file along with your video to your platform of choice, like YouTube or Vimeo, and make sure captions are turned on in their player settings.
A quick sanity check of your export settings before hitting that render button will save you the headache of a full re-export. It’s a tiny step that prevents a huge problem.
Is It Better to Style Captions Manually or Use a Preset?
Please, for the sake of your sanity, use a preset. Creating and using a style preset is always the better choice. Manually adjusting the font, size, and position for hundreds of individual caption clips is not only mind-numbingly tedious but also a recipe for inconsistency.
Here's the professional workflow: style one caption clip perfectly in the Essential Graphics panel. Nail the font, size, background, and placement. Then, under "Track Style," just click "Create Style" and give it a memorable name. Now you can select every other caption on that track and apply your new preset in a single click, guaranteeing a clean, uniform look across your entire video.
Ready to create hyper-accurate transcripts and subtitles in seconds, not hours? HypeScribe uses advanced AI to turn your audio and video into precise text with up to 99% accuracy, generating smart summaries and action items along the way. Stop wasting time on manual corrections and start producing professional captions effortlessly. Try it for free at https://www.hypescribe.com.


