How to Record Audio in Discord (All Platforms 2026)
You finish a Discord call and realize the important part is already slipping away. Someone volunteered for a deadline, someone else raised a risk, and one great idea showed up in passing and never made it into notes.
That is usually the moment people search for how to record audio in Discord.
Discord works well for live conversation, but it does not give you a built-in way to record server voice chats. That gap has pushed people toward bots, desktop capture tools, and mobile workarounds, and those options are now common enough to feel like part of the Discord toolkit rather than a niche hack.
Why You Might Need to Record Discord Audio
Discord calls are not just for gaming anymore. Teams run standups there. Creators record guest interviews there. Students hold study sessions there. Community managers host town halls there.
When the call matters, a recording matters too.
According to Remi8’s guide on recording Discord audio, Discord lacks native audio recording functionality, which is why users rely on tools like Craig Bot, OBS Studio, and Audacity. In practice, that means you need to decide early whether you want speed, control, or convenience.
Common reasons people record
Some needs are straightforward.
- Team meetings: Capture decisions, action items, and follow-ups when nobody wants to type notes during the call.
- Podcast interviews: Keep a clean record of guest conversations so editing is easier later.
- Classes and study groups: Revisit explanations, terminology, or discussion points after the session ends.
- Community events: Save Q&As, panel talks, and moderated discussions for people who missed them.
- Research and journalism: Preserve interviews accurately before turning them into quotes, notes, or summaries.
Other needs are less obvious. Sometimes recording is not about publishing anything. It is just about not losing context.
The three paths that work
Many users end up using one of these:
A Discord bot
This is the fastest route for server-based calls. You invite the bot, start it with a command, and download the file when the session ends.
Local recording software
Tools like OBS Studio run on your computer and capture audio directly. This takes more setup, but gives you better control over tracks, routing, and output.
A mobile workaround
On phones and tablets, built-in screen recording is usually the practical option. It is convenient, but more limited and more prone to capture issues.
Practical rule: Use a bot when speed matters, OBS when quality matters, and mobile recording only when you have no desktop available.
The right choice depends on the call itself. A quick internal sync does not need the same workflow as a podcast or training session.
Choosing Your Discord Recording Method
Picking the tool first saves a lot of frustration later. The wrong method usually fails in one of three ways. It is too complicated for the moment, it records the wrong audio, or it creates extra cleanup you did not plan for.
A server bot feels light because it lives inside Discord. OBS feels heavier because you need to think about sources, monitoring, and export settings. Mobile recording feels simple until you discover your phone captured half the call or mixed everything into one track.
Discord Recording Method Comparison
| Method | Ease of Use | Audio Quality | Key Feature | Best For |
|---|---|---|---|---|
| Bot recording with Craig | Easy | Good, especially when separate speaker files are available | Starts and stops inside the server with slash commands | Team calls, community chats, simple interviews |
| OBS Studio | Moderate to advanced | High, with more control over sources and exports | Local capture with detailed source setup | Podcasts, streams, training, polished production |
| Mobile screen recording | Easy to start, limited in practice | Variable | Works directly on phone or tablet without extra desktop software | Quick captures when you are away from your computer |
What matters most when choosing
A bot is usually best if you need the least friction. You do not want to teach a guest how to configure software. You want the server to handle the session and you want a file at the end.
OBS is better when the recording itself is part of a larger workflow. If you plan to edit, isolate speakers, combine Discord with visuals, or preserve cleaner audio for later use, local capture wins.
Mobile is the fallback. It is useful, but not elegant. Expect compromises.
Trade-offs that affect the result
Here is where experienced users make the call:
- Need separate tracks: Bot workflows are appealing because they can simplify speaker-by-speaker capture. That makes editing and transcription easier later.
- Need visual capture too: OBS is stronger when you want Discord audio plus screen content or a video layer.
- Need low setup overhead: Bots beat desktop software when the goal is to record now, not configure a studio.
- Need flexibility after the call: Local recording gives you more options when you hit problems in post-production.
If your end goal is searchable notes rather than raw media, pairing your recording workflow with a dedicated app for recording meetings can save time after the call ends.
Use case filter: For a one-off community chat, use the easiest tool. For anything you may publish, archive, or edit heavily, choose the tool that gives you cleaner source material.
A quick selection guide
Choose a bot if:
- You record inside a server often
- You want minimal setup
- You need something teammates can repeat without training
Choose OBS if:
- You care about audio routing
- You want more consistent exports
- You need a recording workflow you can refine over time
Choose mobile if:
- You are not near a computer
- You only need a reference recording
- You can accept a less flexible file afterward
Recording with Bots The Easy Way
For most Discord users, a bot is the shortest path from live conversation to saved audio.
Craig became a standard option because it fits how Discord already works. You add it to the server, use a command in the voice channel, and let it sit in the room while everyone talks.

According to Riverside’s Discord recording guide, the Craig Bot workflow typically runs through seven to twelve steps, including going to craig.chat, inviting the bot to a server, authorizing access, using /join in the voice channel, stopping with /stop, and downloading the files from direct messages.
How the bot workflow usually goes
The process is simple, but a few details matter.
Invite the bot to the right server
Make sure you are adding it to the specific server where the call will happen. This sounds obvious, but it is one of the most common setup mistakes.
Approve permissions carefully
The bot needs access to join and function in the voice environment. If the permissions are too limited, it may appear added but fail when the session starts.
Join the voice channel first
Once you are in the call, use the command to bring the bot into that channel.
Start recording with the bot command
The usual Craig workflow uses /join to begin and /stop to end.
Download the files after the session
Craig sends downloads through direct messages, so check DMs rather than hunting around inside the server.
Why bots work so well for routine calls
Bots remove most of the setup burden. Nobody needs to install a recorder. Nobody has to build a scene in OBS. The recording happens in the same place as the conversation.
That matters for:
- Internal team meetings
- Volunteer communities
- Recurring server events
- Guest calls where you want the least technical friction
A short walkthrough helps if you want to see the flow before trying it live.
Where bots fall short
Bot recording is convenient, not magical.
You still need to manage the output. Depending on the format you download, you may end up with larger files than expected or need a conversion step before sending the audio elsewhere. Bot workflows also depend on server access and permissions, which means they are not ideal for every private or tightly controlled environment.
The other issue is control. With a bot, you generally accept the workflow it gives you. You do not get the same hands-on routing, monitoring, and fine-tuning that local software gives you.
Best fit: Use a bot when your top priority is getting the conversation saved with minimal effort and minimal coaching for everyone else on the call.
What I look for in a bot recording
A good bot-based session should give you three things:
- Clear confirmation that recording started
- A reliable stop process
- A download method that is easy to retrieve right away
If any of those feel uncertain, test the workflow in a private server before using it for a real interview or meeting. Five minutes of testing saves a lot of damage control later.
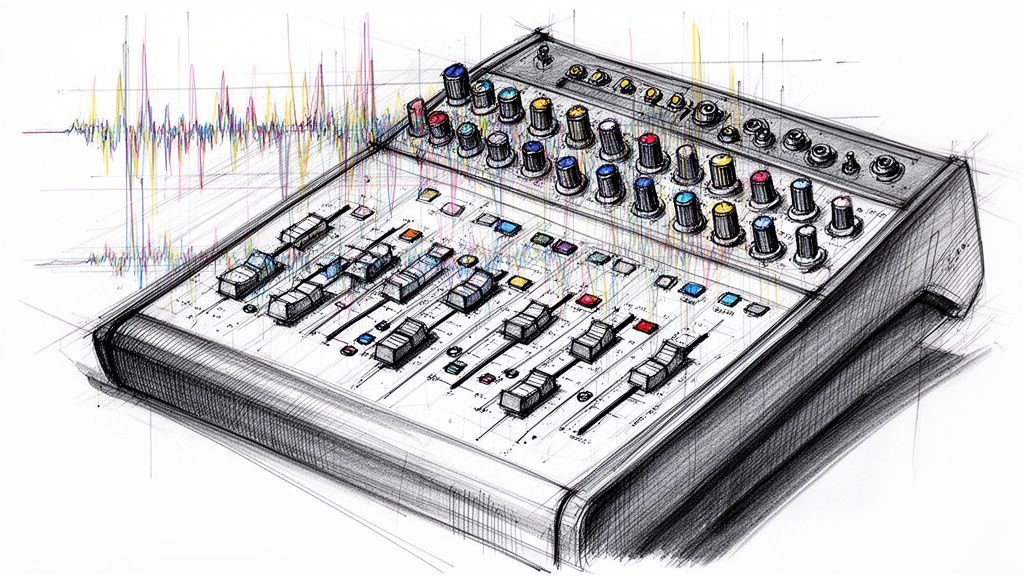
Pro-Level Recording with OBS Studio
OBS Studio is the better choice when you need control.
It asks more from you up front, but it pays that back in cleaner capture, better routing, and fewer compromises later. If I were recording a guest interview, a training session, or anything I might publish, OBS would be the first desktop option I would reach for.
According to Hollyland’s guide to recording Discord audio, you can add Application Audio Capture in OBS on Windows 10+ and select Discord.exe. The same guide recommends a 48 kHz sample rate to match Discord output and a 160-320 kbps bitrate for high-quality exports.
A practical OBS setup
The most useful setup is usually this:
- One source for Discord audio
- One source for your microphone
- Optional screen or window capture if you also need visuals
That separation matters. If Discord audio and your mic are blended too early, editing becomes harder. You lose the ability to clean up one side without affecting the other.
The settings that matter most
A lot of OBS menus can be ignored at first. These are the settings worth paying attention to.
- Application Audio Capture: Point this at Discord so OBS records the app directly instead of guessing through a broad system mix.
- Sample rate: Set OBS to 48 kHz so it matches Discord’s native output more closely.
- Bitrate: For exported audio, 160-320 kbps is a sensible quality range from the cited guide.
- Recording destination: Set this before you start. Lost files are often just files saved somewhere unexpected.
Why OBS is worth the effort
OBS is stronger than bot recording when the call is only one part of a bigger production workflow.
For example:
- You want Discord on one track and your mic on another.
- You want to capture a training demo with voice plus screen.
- You want to monitor levels before the call turns into a ruined file.
- You want to export a format that fits your editing workflow better.
It also handles repeatability well. Once you have a scene set correctly, future recordings get easier.
Tip: Run a short test recording every time you change devices, headphones, or source settings. OBS is powerful, but one wrong source selection can still give you a silent file.
One caveat that catches people
OBS is local software. That is its strength, but also its responsibility. You are managing sources, storage, and exports yourself.
Some users also run into conversion friction afterward. In broader Discord recording workflows, OBS recordings can default to formats that are less convenient for audio-only use, which can force an extra remux or conversion step before the file is ready to share or archive.
If you want a set-it-and-forget-it experience, use a bot. If you want the best chance at a polished result, use OBS and spend the extra few minutes setting it up properly.
Recording on Mobile and Fixing Common Problems
Mobile recording is possible, but it is rarely the cleanest route.
If you are on iPhone or Android, the usual workaround is the built-in screen recorder. That gives you a fast way to capture a Discord conversation without joining from a computer, but the file is typically less flexible afterward.

How mobile recording usually works
On both iOS and Android, the basic pattern is similar:
- Open Discord and join the call.
- Start the device’s screen recorder.
- Confirm whether the recorder is also set to use the microphone if you need your voice captured.
- Let the session run.
- Stop recording and review the file immediately.
That last step is important. On mobile, assumptions cause problems. Check the clip before anyone leaves the call.
If you record from Android often, this guide on how to record audio on Android is useful background for the device-side capture basics.
What mobile is good at
Mobile is fine for:
- Quick reference captures
- Unexpected calls when you are away from your desk
- Voice discussions you mainly want to review later
It is not ideal for polished production. You usually get less control, fewer routing options, and more mixed audio.
Fixing echo, desync, and silent captures
Many individuals encounter difficulties here.
According to this YouTube guide covering Discord recording issues, users frequently report audio-video desync and echo in multi-track recordings, and Discord’s hardware acceleration can cause noticeable lag on some GPUs. A common fix is to disable Use Hardware Acceleration in Discord’s Voice & Video settings.
That fix is worth trying first if your recording drifts out of sync or feels delayed.
Common problems and practical fixes
Echo in the recording
This often happens when your speakers feed back into your mic, or when multiple capture paths grab the same audio. Headphones help immediately. In desktop workflows, check whether both system audio and app audio are being captured at once.
Audio and video do not line up
If you use Discord with gameplay, screen recording, or stream content, hardware acceleration can complicate timing. Disable that setting in Discord and run a short test again.
OBS is not hearing Discord
Make sure the source is the app itself, not a generic output you assume includes Discord. If needed, reselect the capture source and verify the app is active during testing.
Bot joins but nothing useful gets saved
Recheck permissions, channel placement, and whether the recording started. Do not wait until the end of a long session to verify.
A better troubleshooting habit
Do not troubleshoot after the important call. Troubleshoot before it.
Use a one-minute test with a friend or a second account. Say a few lines, stop the recording, and listen back with headphones. You will catch routing mistakes, clipping, missing mic audio, and timing drift quickly.
Fast diagnostic rule: If the waveform is moving but the recording sounds wrong, the issue is usually routing or monitoring. If the waveform is flat, the source selection is usually wrong.
When to stop fighting the setup
If mobile keeps failing and the call matters, switch devices. That is often the smartest fix.
A phone is great for convenience. A desktop is better for confidence. When the recording needs to survive editing, review, or formal documentation, desktop tools are easier to trust.
The Golden Rule Consent and Legality
Recording first and asking later is a bad habit.
The technical part of how to record audio in Discord is not the hard part. The hard part is doing it in a way that is legal, clear, and respectful to everyone in the room.
A major weakness in many Discord recording tutorials is that they skip consent entirely. As noted in Zapier’s guide on recording Discord calls, Discord transparency reporting has tied account bans to unauthorized recordings, which makes consent a practical issue, not just an ethical one.
The safest rule
Get explicit permission from everyone before the recording starts.
Do not rely on silence. Do not assume people are fine with it because the call is casual. Do not assume a bot notification is enough.
The easiest ways to handle consent
- Say it out loud: At the start of the call, announce that you want to record and wait for verbal agreement.
- Put it in writing: Ask for confirmation in a server text channel or direct message before the session begins.
- State the purpose: Tell people whether the recording is for notes, training, editing, publication, or transcription.
- Respect objections: If someone says no, stop and choose another way to document the conversation.
Why this matters beyond policy
Unauthorized recordings can create trust problems long before they create platform or legal problems. Teams get quieter. Guests get guarded. Community members stop showing up.
Simple standard: If everyone on the call would be comfortable hearing the recording plan before you press record, you are on the right track.
If you work in HR, journalism, education, or any context involving sensitive information, be even more careful. Transparent recording practices protect you and everyone else involved.
Turn Your Discord Recording into Action with HypeScribe
A recording is useful. A searchable record is better.
Once the Discord call is saved, the work often begins. Someone needs to pull out the decisions, identify tasks, find the quote worth keeping, or turn a long discussion into something the rest of the team can use.
That is where a transcription workflow earns its place. Upload the file you saved from a bot or exported from OBS, then turn spoken discussion into text you can scan, search, share, and organize. If you want a broader look at that workflow, this overview of AI-powered transcription software is a good starting point.
What a better post-call workflow looks like
The strongest setup is simple:
- Record the call cleanly
- Name the file clearly
- Upload it right away
- Review the transcript while the conversation is still fresh
- Pull action items before they disappear into chat history
That approach works for meetings, interviews, training, and research calls.
Instead of replaying an hour-long Discord session to find one decision, you work from a transcript. Instead of vague memory, you get a usable record. Instead of “someone said they would handle that,” you get a line you can verify.
For teams, that is the difference between recording for storage and recording for follow-through.
If you want to turn Discord recordings into searchable transcripts, summaries, key takeaways, and action items, try HypeScribe. It gives you a fast way to upload audio from bots, OBS, or mobile captures and turn raw conversations into something your team can use.


