Podcasting with an iPhone: A Step-by-Step Guide for 2026

You absolutely can create a fantastic, professional-sounding podcast using just your iPhone. The device you carry everywhere is a powerhouse, packed with surprisingly good microphones and an entire world of apps for recording and editing. From my own experience, it's the perfect way to get your voice out there without getting bogged down by complicated gear.
Is an iPhone Really Good Enough for Podcasting?
Let's clear this up right away: yes. There’s a persistent myth that you need a soundproofed room and thousands of dollars in equipment to even think about starting a podcast. That’s just not true anymore. The supercomputer in your pocket is more than up to the task, and I've seen countless successful shows launch with nothing more than a great idea and an iPhone.
This is a huge deal. It means you can go from idea to recording your first episode today. The built-in mics on modern iPhones are impressive, and the seamless way they work with recording apps strips away a ton of the usual technical headaches.
Why Your iPhone Gives You an Advantage
The iPhone’s real superpower, though, is its direct line to the largest podcast audience on the planet. By 2026, experts project that 619.2 million people worldwide will be listening to podcasts. iPhones are poised to capture a staggering 62.1% of that audience, dwarfing Android’s 22.8%.
In fact, Apple Podcasts reported that iPhone plays accounted for 85% of their total in 2025. When you create your show on an iPhone, you're building it inside the very environment where the most engaged listeners already are. You can read more about these podcasting trends and how they're shaping the creator landscape.
The best microphone is the one you have with you. For millions of aspiring creators, that microphone is built right into their iPhone. Don't let the pursuit of perfection stop you from starting.
Take that to heart. The barrier to entry has all but vanished. Your energy is better spent on crafting compelling stories and connecting with listeners, not worrying about gear. Your iPhone isn't a compromise; it's a launchpad.
Upgrading Your Audio: A Quick Guide
While the built-in mic is a fantastic starting point, it's smart to know what your upgrade path looks like. The beauty of podcasting with an iPhone is that you can level up your sound quality gradually and affordably. You don’t need to immediately jump to a complex setup with an XLR microphone and an audio interface.
To give you a clearer picture, here’s a quick rundown of the most common microphone options you can use with your iPhone.
iPhone Microphone Options At A Glance
| Microphone Type | Best For | Audio Quality | Price Range |
|---|---|---|---|
| Built-in iPhone Mic | Getting started, solo recording | Good | Free |
| Lavalier Mic (Wired) | Interviews, on-the-go recording | Better | $20 - $80 |
| USB/Lightning Mic | Solo recording at a desk | Great | $50 - $150 |
| Wireless Mic System | Vlogging, dynamic interviews | Excellent | $150 - $300+ |
As you can see, each step offers a real, noticeable improvement in sound without breaking the bank. You can start with what you have and invest back into your show as it grows. This makes podcasting with an iPhone a sustainable and genuinely exciting journey for any new creator.
What Gear Do I Need to Podcast with an iPhone?
Let's be honest, you can record a podcast using nothing but the microphone built into your iPhone. But if you want to sound professional, a few key pieces of gear will make an incredible difference. Think of your iPhone as the brain of your operation. It’s powerful, but to really make it sing, you need a great microphone and the right software.
I’ve recorded in all sorts of places—from sound-treated closets to noisy coffee shops—and I've learned that you don't need a mountain of expensive equipment. You just need to be smart about what you buy. The focus here is on gear that gives you the biggest bang for your buck in audio quality and makes your recording life easier.
Upgrading Your Microphone
If you make only one upgrade, make it an external microphone. It’s the single most important thing you can do for your sound. The mic on your iPhone is designed to pick up everything around you, which is why your recordings can sound distant and full of room noise. An external mic, on the other hand, is built to focus on one thing: your voice.
For iPhone podcasters, a couple of types work especially well.
- Lavalier Microphones: These are the little clip-on mics you see on news anchors. They're fantastic for interviews or recording while you’re out and about because they stay a fixed distance from your mouth, keeping your audio levels consistent. A simple wired lav that plugs into your iPhone's Lightning port (you might need an adapter) is an affordable and seriously effective choice.
- Condenser Microphones (USB/Lightning): If you're recording at a desk, a USB or Lightning condenser mic is your best bet for getting that rich, classic "radio voice." Models like the Shure MV7 or Rode NT-USB+ are popular for a reason—they deliver incredible quality and connect right to your iPhone, basically turning your desk into a mini-studio.
Here's a pro tip that’s non-negotiable: get a pop filter. It's a simple mesh screen that stops the harsh "p" and "b" sounds from creating an ugly popping noise in your recording. It’s a cheap accessory that makes you sound instantly more professional.
While your iPhone is a fantastic and portable tool, it's worth understanding the broader world of podcasting gear. For a deeper dive into more traditional setups, check out this guide on the essential equipment needed for a podcast. It will help you see where your mobile rig fits in.
The Best Apps for Recording and Editing on iPhone
The hardware gets your voice into the phone, but the software is where the magic really happens. The App Store has everything from dead-simple recorders to full-blown production studios. The best one for you really depends on how much editing you plan to do.
Free But Powerful Options
When you're just starting, you don't have to spend any money on software. Apple gives you some surprisingly capable tools right out of the box. GarageBand, which comes free on every iPhone, is a fantastic multi-track audio editor. You can record different tracks, move audio clips around, and even add intro music from its built-in library.
Don't overlook the native Voice Memos app, either. It’s perfect for capturing high-quality audio quickly and easily. A lot of the simple actions you take in Voice Memos, like trimming a clip, are the same fundamental skills you’ll use in more advanced apps. In fact, if you've ever used dictation on iPhone, you’re already familiar with the basics of capturing clean audio.
Paid And Feature-Rich Apps
When you feel you've outgrown the free options and want more control without jumping to a computer, a paid app is your next step.
| App Name | Best For | Key Feature | Price Point |
|---|---|---|---|
| Ferrite Recording Studio | Serious mobile editing | Multi-track editing, automations | Free (with In-App Purchases) |
| Hindenburg Field Recorder | Journalists & storytellers | One-touch audio enhancement | Paid (Subscription) |
For anyone truly committed to podcasting on their iPhone, I always recommend Ferrite Recording Studio. It’s built from the ground up for a touchscreen, making editing feel intuitive. You can slice up interviews, smooth out volume levels, and add fades with just a few taps.
It handles big projects with multiple tracks effortlessly, which is a lifesaver when you're mixing an interview with music and sound effects. The free version is good for a test drive, but the paid features unlock its true power, giving you a professional-grade audio editor that fits in your pocket. Having that capability on the go is absolutely indispensable for a mobile creator.
How to Record and Edit Your First Episode on iPhone
Alright, you've got your gear sorted. Now for the fun part: actually recording and editing your first episode. This is where your podcast idea stops being just an idea and becomes something real, something people can tune into. And yes, you can do the entire thing—from capturing your voice to mixing in music and snipping out mistakes—right on your iPhone.
My goal here is to give you the practical, battle-tested advice you need to get it done. I’ll show you how to find a good recording spot, dial in the right settings, and turn your raw audio into a polished, professional-sounding final cut. It's a lot less technical than you might think.
Set The Stage For Great Audio
Before you even think about hitting the record button, you need to deal with your environment. It's your most important piece of gear. Pro studios sink thousands into soundproofing, but honestly, you can get 80% of the way there for free. The big enemy is reverb—that echoey, bathroom-like sound you get from sound waves bouncing off hard surfaces.
Your mission is simple: find a space filled with soft stuff that can soak up that sound.
- Your Closet Is Your Best Friend: I'm not kidding. A walk-in closet packed with clothes is the home-recording gold standard. All that fabric acts as a natural sound dampener, killing echo and giving your voice a rich, direct quality.
- Look for Rugs and Curtains: If a closet setup won't work, scout for a room with thick carpets, heavy curtains, and maybe a couch or two. A bedroom usually fits the bill. Stay away from kitchens, empty offices, or any room with tile floors and bare walls.
- Build a Pillow Fort: It might feel a bit silly, but it absolutely works. Building a little nest of pillows or blankets around your recording spot helps absorb those pesky sound reflections. It's a quick and dirty trick that makes a huge difference.
This simple diagram breaks down the core components you need. It all starts with your iPhone, your mic, and the right apps.
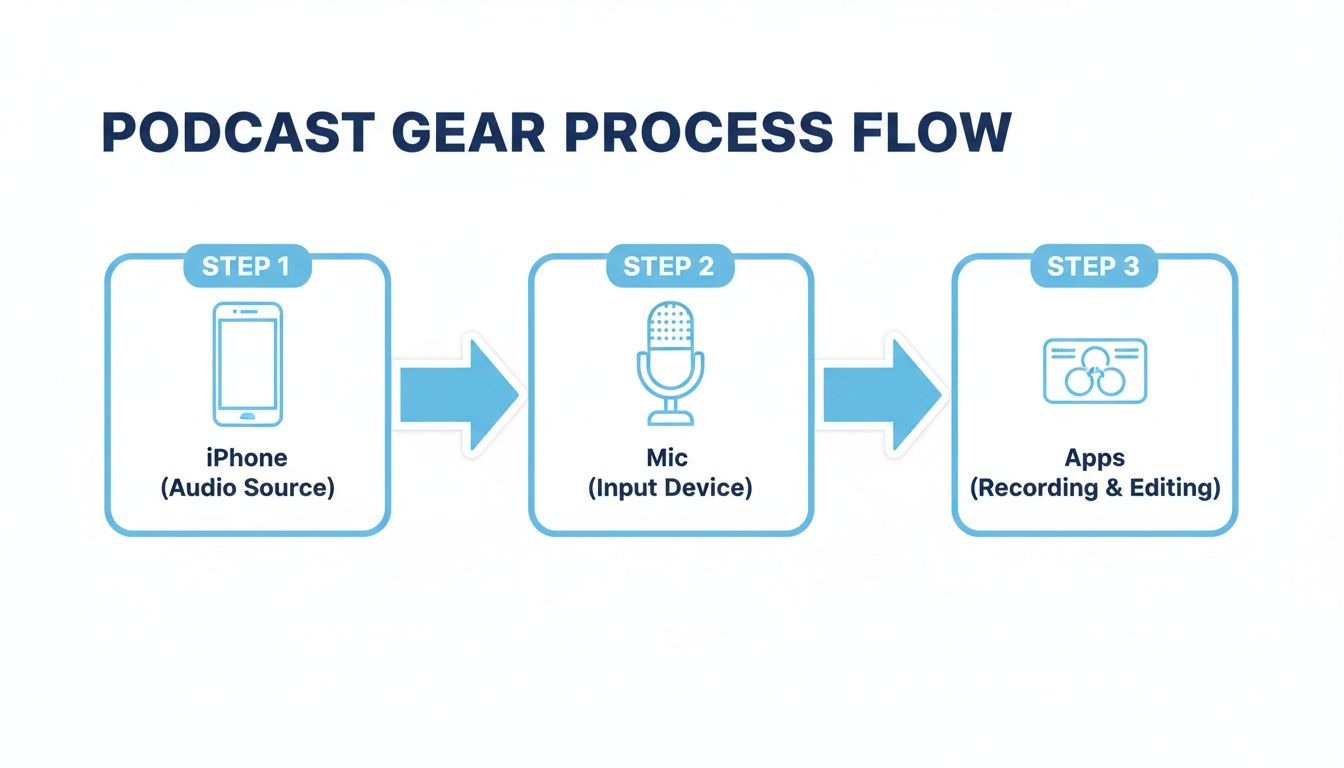
As you can see, the workflow is straightforward. You don't need a complicated studio setup to get started—just these three elements.
Recording Your First Track
Once your space is ready, it's time to fire up a recording app. While the built-in Apple Voice Memos app is fine for jotting down a quick idea, I'd strongly recommend an app that gives you more podcasting-specific control. My go-to recommendations are Ferrite Recording Studio or GarageBand.
Let's imagine you're using Ferrite, since it's designed from the ground up for podcasting.
First, you'll create a new project. This opens up a timeline, which is basically the canvas where your episode will take shape.
If you’ve plugged in an external mic, make sure the app is actually using it. It usually detects it automatically, but it never hurts to pop into the settings and confirm your mic is the selected input source.
Now for the most important part: checking your levels. Start talking into the mic at your normal speaking volume and watch the audio meter. You want the meter to bounce nicely into the yellow zone, hovering somewhere around -12dB to -6dB. If it constantly hits the red, you're "clipping" the audio. That means it's distorting, and there is no way to fix that in post-production. It's a ruined take.
Don't try to be perfect on your first take. It's going to feel a little weird at first. Just talk. You can always edit out the "ums," "ahs," long pauses, and stumbles later. The goal isn't perfection; it's getting a complete recording.
Editing Your Episode On The Go
Editing is where the magic happens. It might seem intimidating, but doing it on a touchscreen is surprisingly natural. It feels a lot like editing a document—you're just highlighting, cutting, and moving blocks of sound instead of text.
You'll mostly be focused on a few key tasks:
- Trimming the Fat: Snip off the dead air at the beginning and end of your recording.
- Cleaning Up Mistakes: Find those coughs, flubbed lines, or long pauses. Just select that bit of audio and hit delete. The clips will snap together perfectly.
- Adding Music: Import your intro and outro music onto a separate track. From there, you can easily adjust its volume so it fades in nicely at the start and ducks under your voice.
In an app like Ferrite, you can split an audio clip with a tap, drag the edges to trim it, and then drag the whole thing to a different spot on the timeline. It’s very hands-on. Some people also use Apple's Voice Memos for quick trims before exporting. If you go that route, it’s worth learning more about Apple Voice Memo transcription to see how you can repurpose that audio later.
How to Record Remote Guests on Your iPhone
What happens when your co-host or guest is in another state? Whatever you do, don't just record a standard phone call. The audio will be compressed, unreliable, and will instantly make your podcast sound amateurish.
The solution is a dedicated remote recording platform. Services like Riverside.fm or Zencastr have fantastic mobile apps that make this incredibly easy.
Here's the process: you send your guest a simple link. They click it and join the session from their phone or computer. The platform then records each person's audio locally—meaning it saves a high-quality file directly on their own device.
After the conversation, the platform gives you separate, high-fidelity audio tracks for you and your guest. This completely bypasses the glitches and compression of a live internet call. It’s the secret to making a remote interview sound like you were both sitting in the same professional studio.
How to Publish Your Podcast From an iPhone
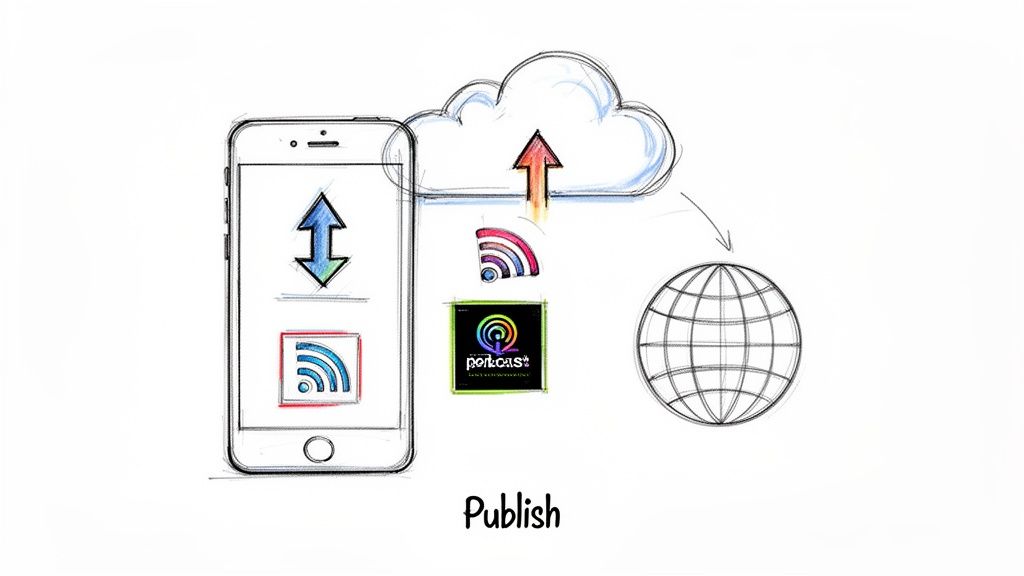
You've done the hard work of recording and editing. Now for the fun part: getting your show into the ears of listeners around the world. This is the final step where that audio file sitting on your iPhone becomes a real, discoverable podcast.
The whole process boils down to a few key moves you can easily handle from your phone. You'll add some final sonic polish, package it with all the right info, and then send it off to a podcast host who does the heavy lifting of distribution.
Applying The Final Polish With Mastering
Before you hit publish, there's one last touch that can make a huge difference: mastering. Don't let the technical term scare you off. Think of it like the final filter you apply to a photo to make the colors pop and everything look cohesive. Mastering does the same for your audio.
Automated services have made this incredibly simple. Auphonic, for example, has a great mobile app. You just upload your finished episode, and its algorithms work their magic. It will:
- Balance the volume to meet industry loudness standards (so no one has to crank up their volume).
- Clean up any lingering background hum you might have missed.
- Even out the levels between you and your guest so you both sound present.
This one step gives your episode a professional sheen and makes for a much better listening experience.
Crafting Your Episode's First Impression
In a crowded podcast feed, how your episode looks and reads is just as crucial as how it sounds. This is your marketing moment, and you can manage it all right from your iPhone.
Your episode’s title is your hook. "Episode 3" won't cut it. Instead, try asking a question or teasing the most surprising takeaway from your discussion. Give someone a reason to be curious.
While your show has main cover art, many platforms let you use unique art for each episode. This is a great way to stand out. An app like Canva makes it surprisingly easy to design sharp-looking graphics on the go.
Finally, your show notes are your secret weapon for discovery. This is where you put your SEO to work. Write a quick summary, drop in links to resources you mentioned, and add guest bios. This text is searchable in apps like Apple Podcasts, helping new listeners find your content.
Your episode title and show notes are your sales pitch. They are what convince someone to press play. Spend time making them clear, descriptive, and compelling.
Embedding Metadata With ID3 Tags
Here’s a pro tip: before uploading, embed information directly into your audio file using ID3 tags. This is just a digital label that sticks to your MP3, carrying your podcast name, episode title, cover art, and more.
Why bother? If someone downloads your episode directly, that metadata travels with the file, so your branding is never lost. Some iPhone editors like Ferrite let you edit these tags. If not, don't worry—most podcast hosts will handle it for you during the upload. If you're wrestling with different file types, our guide on how to convert a Voice Memo to MP3 can be a real lifesaver.
Choosing a Host And Submitting To Directories
Your finished audio file doesn't go straight to Spotify or Apple Podcasts. It first needs a home, and that home is a podcast host. This is a service that stores your audio files and generates a special link called an RSS feed.
Podcast hosts like Buzzsprout, Libsyn, and Transistor all have fantastic mobile-friendly websites that make uploading from your iPhone a breeze. You’ll upload your final MP3, paste in your title and show notes, and schedule it or publish it immediately.
The first time you publish, you'll take that RSS feed link from your host and submit it—just once—to each major podcast directory:
- Apple Podcasts
- Spotify
- Google Podcasts
- Amazon Music
After that initial setup, you're done. The directories will automatically check your feed for new episodes. From now on, publishing a new episode is as simple as uploading the file to your host. To really reel in listeners, it's also a smart move to create a central hub for your show with a dedicated landing page. You can check out some great podcast landing page examples for inspiration.
How to Automate Your Podcast Workflow
Let's be honest. The real work of podcasting often starts after you've hit stop on the recording. That post-production grind—transcribing, writing show notes, crafting social media posts, and turning your audio into a blog post—can take hours. It’s the part of the process that burns out so many creators, but it’s also where a smart tool can completely change your workflow.
This is especially true when you're podcasting with an iPhone, because your whole setup is built around speed and convenience. HypeScribe was built to tackle this exact problem, turning hours of tedious work into a few minutes of hands-off automation. You just feed it your audio, and it gives you back polished, ready-to-use content.
Imagine you just wrapped up a great interview on your iPhone. Instead of settling in for a long evening of typing, you just upload that final audio file directly to HypeScribe.
From Audio To Actionable Content in Seconds
Within moments, the AI is already working its magic. You don’t just get a clunky text file, either. What comes back is a highly accurate, time-stamped transcript that becomes the foundation for everything else.
This kind of speed is a game-changer. For journalists or creators on a tight deadline, getting an iPhone recording transcribed with up to 99% accuracy in over 100 languages is massive. It instantly makes your audio searchable and ready for your episode page. With the global podcast audience expected to hit 619 million by 2026 (up from 584.1 million in 2024), discoverability is everything. In the US alone, 34% of listeners are on Apple Podcasts, a platform that heavily rewards text-based content like transcripts. You can see more data on this in studies about the rise of Apple Podcasts for creators.
But a transcript is just the beginning. HypeScribe's AI doesn't just hear words; it understands context. This is where you really start to get your time back.
Generating Your Podcast's Marketing Assets
Once the transcript is done, HypeScribe’s AI tools let you generate an entire suite of marketing content with just a few clicks. This is how you take a single audio file and multiply it into a dozen different pieces of content.
Here’s a quick look at what you can create instantly:
- Show Notes: Produce structured show notes with an intro, a summary of key topics, and timestamps that help listeners jump to the good parts.
- Key Takeaways: Pull out the most important insights from your episode into a clean, bulleted list. It's perfect for your website or email newsletter.
- Episode Summaries: Get summaries of different lengths, perfect for your podcast app description or sharing on social media.
- Blog Posts: Convert the entire conversation into a well-formatted blog post, complete with headings and pull quotes, to seriously boost your website's SEO.
Think about this workflow: You finish a 30-minute interview on your iPhone. You upload it to HypeScribe, generate a full blog post, and publish it on your website—all in less than an hour. That's what automating your post-production really looks like.
This isn't about cutting corners; it's about putting your creative energy where it belongs. Instead of getting buried in administrative tasks, you can focus on planning your next great episode, talking with your community, or just taking a well-deserved break. It’s how modern creators manage a consistent publishing schedule without losing their minds, turning a simple iPhone recording into a powerful content engine.
Common Questions About Podcasting With An iPhone
Even after laying out all the steps, a few key questions always pop up when people consider using their iPhone as their podcasting hub. It's completely normal to have some doubts, especially when you're just starting out. Let's walk through the big ones.
The most common concern I hear? It's all about quality. There's a persistent myth that if you're not in a professional studio, your show will automatically sound amateur.
Can I Really Get Professional Audio Quality?
Yes, you absolutely can. The secret isn't a thousand-dollar microphone; it's your recording environment and your technique. These matter far more than the gear itself.
Focus on these three things, and you'll immediately sound better than most beginners.
- Soften Your Room: Echo is your enemy. The easiest way to fight it is by recording in a space with lots of soft surfaces. Think carpets, curtains, a comfy couch, or even a bed. The go-to trick for years has been recording in a clothes-filled closet—it's basically a free vocal booth.
- Mind Your Distance: This is a simple one but so important. Keep a consistent distance from your iPhone's mic (or your external mic). This prevents your voice from suddenly getting louder or quieter, which is a classic sign of an amateur recording.
- Use a Pop Filter: This is the best $10 you'll ever spend on your podcast. A pop filter is a small screen that sits between you and the microphone. It kills those harsh, explosive "p" and "b" sounds that can ruin an otherwise great take.
When you nail these basics—even with a budget-friendly external mic—your audio quality can easily rival much more expensive setups.
How Do I Record With A Co-Host Or Guest?
Recording with someone else is a core part of many podcasts, and your iPhone handles it just fine. The right method just depends on whether your guest is in the same room or on the other side of the world.
For in-person recordings, you could place a single omnidirectional mic between the two of you. But for remote guests, you need a different approach. I always recommend using a dedicated remote recording platform like Riverside.fm or Zencastr.
Whatever you do, don't just record a regular phone call or a Zoom meeting. The audio from those is heavily compressed and can be glitchy. Remote recording services capture each person's audio locally on their own device, giving you separate, crystal-clear audio tracks. This is a game-changer for editing.
Can I Make Money From My iPhone Podcast?
Of course. Monetizing a podcast has nothing to do with the equipment you use and everything to do with the quality of your content and the loyalty of your audience. Once you've started building a consistent listenership, you have plenty of options.
You can look for sponsorships, join ad networks that insert ads for you, or use affiliate marketing for products you genuinely recommend. Many podcast hosts, like Spotify for Podcasters, even have tools built-in to help you manage ads right from your phone.
And don't forget direct listener support. Platforms like Patreon make it easy for your biggest fans to support you directly in exchange for bonus content, all of which you can manage right from your iPhone.
Ready to turn your audio into searchable, shareable content without the grind? HypeScribe uses AI to instantly transcribe your episodes and generate show notes, summaries, and blog posts. Reclaim your time and focus on creating—let us handle the rest. Try it for free at https://www.hypescribe.com.


