Converting WAV to MP3: Best Free Methods 2026

You've probably got a WAV file sitting on your desktop right now that's bigger than it needs to be. Maybe it's a podcast episode, a meeting recording, an interview, or a music bounce. It sounds fine, but it's annoying to email, slow to upload, and overkill for everyday sharing.
That's where converting WAV to MP3 makes sense. The trick isn't just knowing how to do it. It's knowing when to keep the original, which tool fits your situation, and which export settings won't subtly damage the audio.
A casual user can get this done in a few clicks. A podcaster might want more control over bitrate and export quality. A power user with a folder full of files will save time with FFmpeg. If you also work with music production files, it's worth brushing up on related format workflows too, including these pro tips for MIDI conversion from Drumloop AI.
Your Guide to Audio File Conversion
Converting WAV to MP3 is one of those small workflow skills that pays off immediately. You take a file that's easy to edit but awkward to share, and turn it into something most devices, apps, and upload forms handle without complaint.
WAV is usually the file you get from a recorder, DAW, or export from a serious editing session. MP3 is the version you send to someone else. That distinction matters because the wrong order creates problems. If you start editing already-compressed files and keep re-exporting them, quality slips a little more each time.
The three practical paths
People often fit into one of these groups:
- You want the fastest route: Use a desktop app or a browser tool and export once.
- You want control over settings: Use an editor like Audacity so you can choose bitrate and check the result.
- You want repeatability: Use FFmpeg if you're converting the same kind of files often or working in batches.
Practical rule: Keep your original WAV somewhere safe until the MP3 is exported, checked, and delivered.
The right method depends on what you value most. Convenience matters. So does privacy. If the audio contains client calls, interviews, or internal meetings, where the file gets processed matters almost as much as how fast the conversion finishes.
When to Convert WAV and When to Keep It
A good audio workflow starts with one decision: is this file a master or a delivery copy?
WAV has been around a long time. It was first published in August 1991, and it became a foundational uncompressed audio container developed by Microsoft and IBM. Its main strength is fidelity. Its main weakness is size. A typical 3-minute song can be about 30 MB, while converting that same audio to MP3 can bring it down to about 3 MB, which is a roughly 10:1 compression ratio according to Convertio's WAV to MP3 reference.
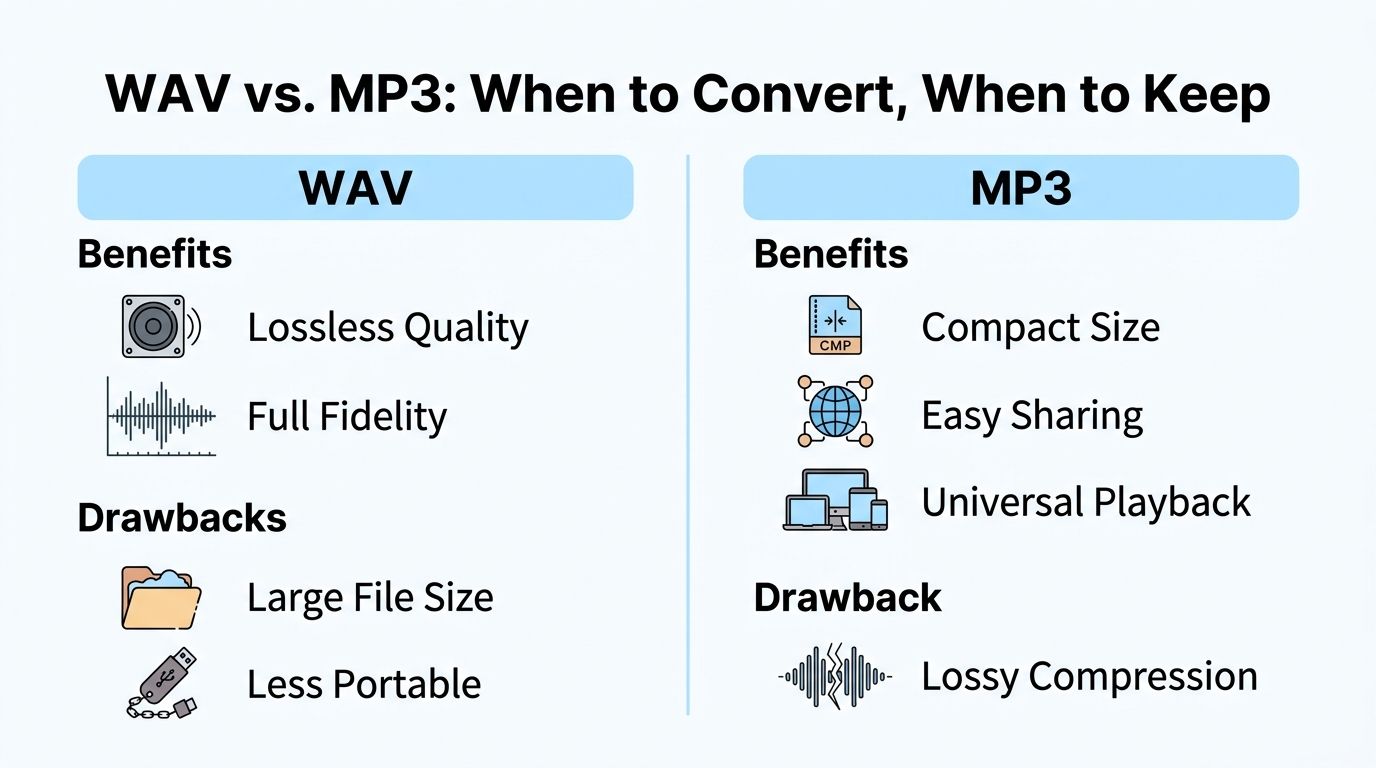
That size gap explains why people convert. A WAV file is excellent in production. An MP3 is easier to move through the world.
Keep WAV when the file still has work to do
If you're still editing, mixing, trimming, restoring, or archiving, keep the WAV. Treat it like the negative from a photograph. It's the clean source you can always return to.
Keep the WAV in situations like these:
- Ongoing editing: You still need to cut sections, remove noise, or rebalance levels.
- Archive storage: You want the highest-fidelity original for future use.
- Master delivery: A client, engineer, or collaborator may need the full-quality version later.
- Future repurposing: You might create multiple exports for different platforms.
Convert to MP3 when the job is distribution
MP3 is the right choice when the file's main purpose is easy playback and transport.
That usually includes:
| Use case | Better format | Why |
|---|---|---|
| Emailing an episode draft | MP3 | Smaller files are easier to send |
| Uploading to a website | MP3 | Faster transfer and broad compatibility |
| Sharing a meeting recap | MP3 | Convenient for non-technical listeners |
| Storing an editable master | WAV | Preserves the original quality |
| Sending final music stems for mastering | WAV | Avoids lossy compression |
Keep one clean master and make your MP3 from that. Don't turn the delivery copy into the new source file.
A lot of audio problems come from deleting the original too early. People bounce to MP3, send it out, then later realize they need a cleaner version for another platform, a transcript, or a re-edit. At that point, they're stuck working from the compressed copy.
Converting Files with Desktop and Web Tools
Often, the simplest answer is still the best one. Open the file, export as MP3, choose sensible settings, and move on. The challenge is picking the right tool for the situation instead of defaulting to whatever site appears first in search.
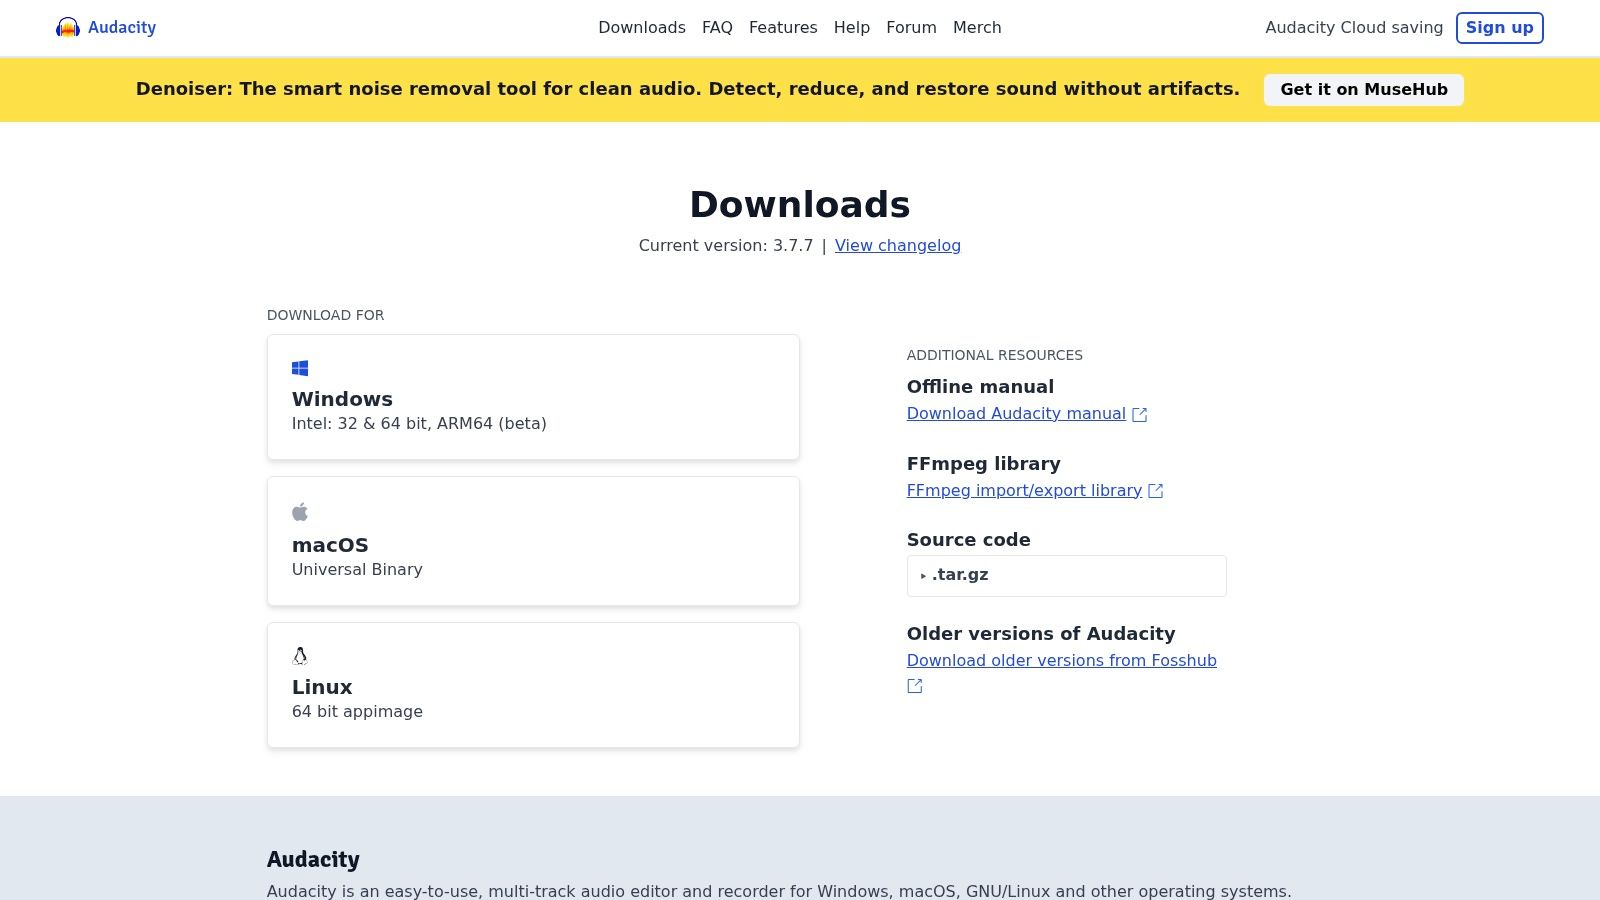
If you want a free desktop editor with enough control to do this properly, Audacity is a safe place to start.
Using Audacity for clean one-off exports
Audacity works well when you want to inspect the waveform, trim silence, normalize levels, or just avoid mystery defaults.
A straightforward workflow looks like this:
- Import the WAV file into Audacity.
- Listen through key sections instead of exporting blind. Check the start, middle, and end.
- Make any last edits you need while the audio is still in WAV form.
- Choose Export and select MP3.
- Set the bitrate intentionally rather than accepting whatever default appears.
- Save the MP3 with a clear filename so it doesn't get confused with the original.
Audacity is also useful because it makes the conversion feel less like a black box. You can hear what you're exporting and catch mistakes before they get shared.
VLC is faster when you don't need editing
VLC can convert audio too, and it's handy if the file already sounds right. It's not my first pick for careful spoken-word delivery, but it's practical for quick format changes.
Use VLC when:
- The file is already final
- You don't need waveform editing
- You want a familiar app that's already installed
Its weakness is the same reason some people like it. It gets out of your way. That's good for speed, but not always good for quality control.
Here's a visual walkthrough if you prefer to follow along instead of reading menu paths:
Web tools are convenient, but privacy changes the decision
Online converters can be useful when you're on a borrowed computer, don't want to install anything, or only need a quick result. But there's a question most guides skip: where does your file go during conversion?
For interviews, meetings, and other sensitive recordings, that matters. Some browser-based tools convert files locally and keep the source file on your own computer instead of uploading it to remote servers, as explained by Wreally's browser-based WAV to MP3 converter.
That creates a real decision framework:
- Browser-based local conversion: Better when the file is sensitive and you want processing to stay on your machine.
- Cloud upload conversion: Fine for low-risk files when convenience matters more than local control.
- Desktop apps: A stronger fit when you want repeatable access without relying on a browser session.
Sensitive audio changes the tool choice. A public music demo and a confidential interview shouldn't follow the same workflow.
If your work often starts from web media rather than local recordings, a related workflow is pulling audio first, then converting or processing it. In that case, this guide on converting YouTube video to MP3 is the more relevant starting point.
You can also use HypeScribe as one option if you want a web-based workflow that includes file handling beyond simple conversion. It supports WAV to MP3 conversion as part of a broader transcription and audio-processing workflow.
Automating Conversion with the Command Line
If you only convert one file every few months, the command line is unnecessary. If you do this repeatedly, it becomes a huge time-saver.
FFmpeg is the tool commonly chosen when reliable, repeatable conversion is needed. It's especially useful when you want a command you can save, script, or reuse across projects.
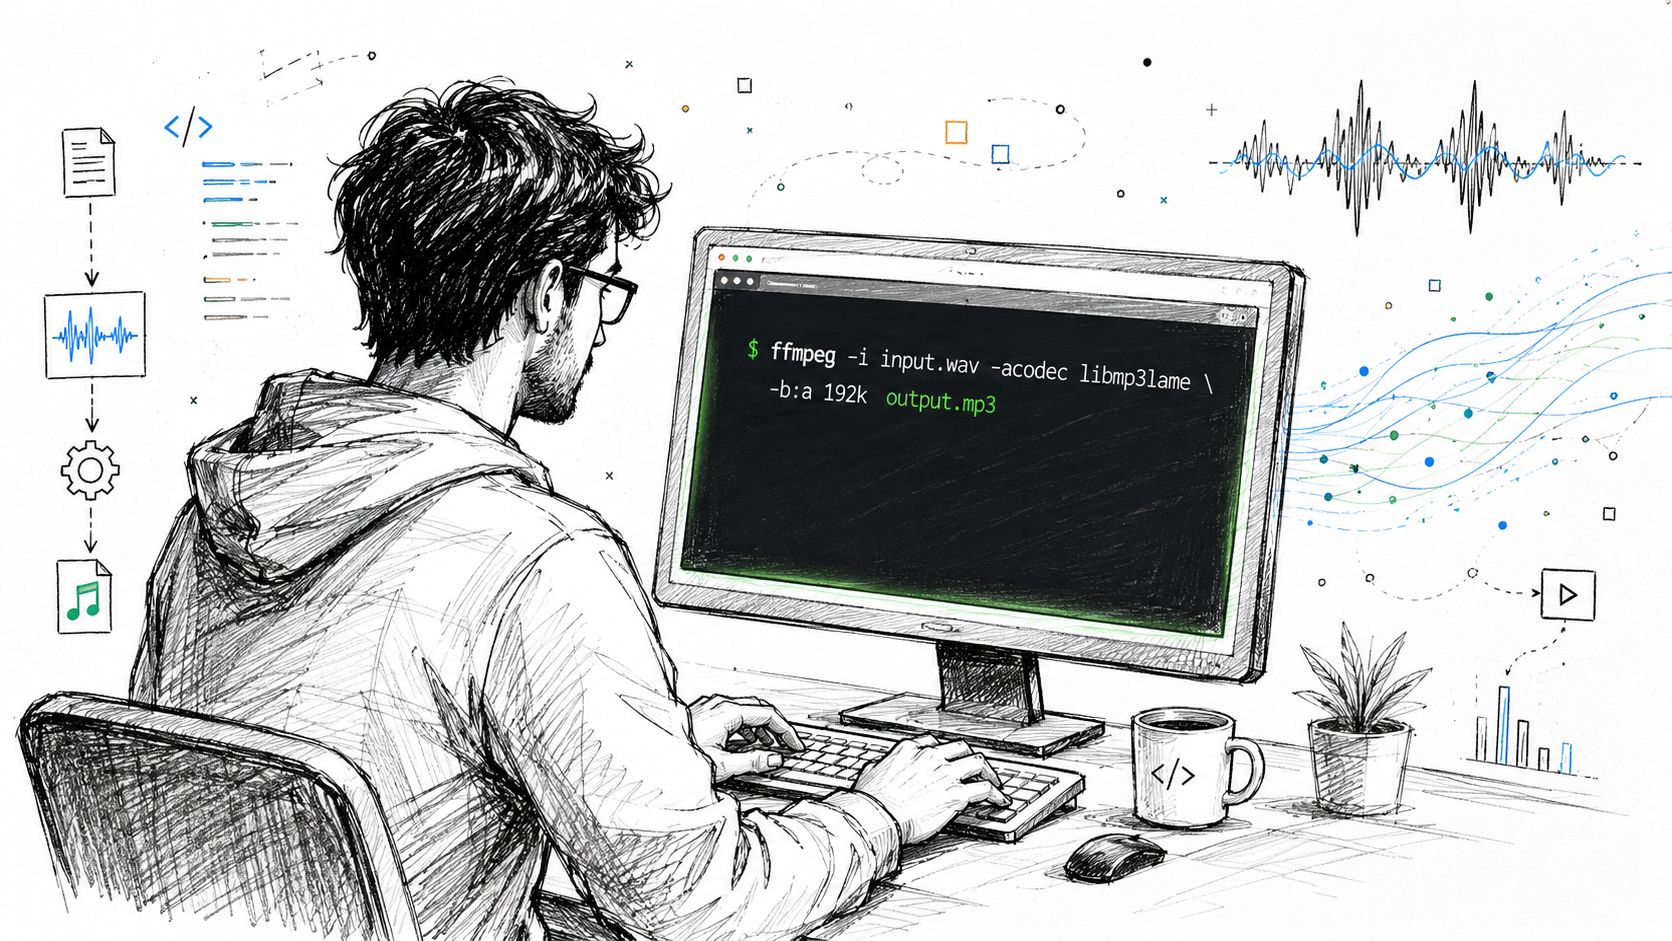
A basic FFmpeg command
A common starting point looks like this:
ffmpeg -i input.wav -acodec libmp3lame -q:a 2 output.mp3
That's short, but every piece matters.
- ffmpeg runs the program.
- -i input.wav tells FFmpeg which file to read.
- -acodec libmp3lame selects the MP3 encoder.
- -q:a 2 sets audio quality in a way many users find convenient for general listening.
- output.mp3 names the exported file.
If you've never used FFmpeg before, the main advantage is consistency. Once you know the command works, you can reuse it without clicking through menus every time.
When FFmpeg is the better option
FFmpeg shines in a few situations:
- Repeated work: You convert files every week and want the same behavior every time.
- Scripted workflows: You want conversion to happen as part of a larger process.
- Large folders: Manual export becomes tedious fast.
- Server or remote environments: You don't have a full desktop app available.
As discussed later in the batch workflow section, FFmpeg is often the more efficient route when volume increases. It also pairs well with adjacent tasks. For example, if you're cleaning up a spoken-word series, you may also need a workflow for merging multiple MP3 files into one.
The command line feels slower only once. After that, it's usually the fastest option you own.
One caution: don't copy commands without understanding the quality settings. Automation is helpful only when the defaults match your intent.
Choosing the Right MP3 Quality Settings
Most bad MP3s aren't caused by the converter. They're caused by careless export settings.
The setting that matters most is bitrate. In plain terms, bitrate controls how much data the MP3 gets to use while representing the audio. More data usually means better retained detail and a larger file. Less data means a smaller file and a higher risk of audible artifacts.
Podcast production guidance warns that repeated lossy re-encoding compounds quality loss. It recommends a spoken-word bitrate around 96 kbps CBR for voice-only material, or 256 kbps+ when music and sound effects matter. It also recommends editing from WAV and exporting to MP3 only at the final stage, as noted by The Podcast Host's WAV to MP3 guidance.

Bitrate is the first setting to get right
Think of bitrate like lane width on a highway. A narrow road can still move traffic, but it gives the audio less room to preserve detail. Dense material such as music, layered intros, or sound design needs more room than a single voice track.
A practical way to choose:
- Voice-only recordings: Around 96 kbps CBR is a sensible spoken-word target when file size matters.
- Music-heavy podcasts or mixed content: Go to 256 kbps or higher.
- Uncertain use case: Export a short test, listen on headphones, then commit.
CBR and VBR aren't interchangeable
You'll usually see either CBR or VBR in export settings.
- CBR: Constant Bitrate. The encoder uses the same bitrate throughout the file.
- VBR: Variable Bitrate. The encoder can spend more data on complex moments and less on simpler ones.
For spoken-word delivery, CBR is often easier to predict. For mixed material, VBR can be perfectly fine if you know your encoder and your playback environment. The important part is not assuming the converter's default is good enough.
Don't obsess over every setting equally
People often get stuck trying to optimize sample rate, channel mode, and every other drop-down before they've made the main decision. In practice, bitrate and export discipline matter more for most users than endless tweaking.
A clean checklist works better:
- Edit the original WAV
- Choose MP3 only for final export
- Set bitrate based on content type
- Listen back to the exported file
- Avoid MP3-to-MP3 re-export cycles
Lower bitrate choices can introduce harmonic distortion and soften bass and transient detail. You usually hear that first on music, but spoken word can lose clarity too.
The safest habit is simple. Finish your work in WAV. Export one final MP3. Keep the WAV archived.
Batch Conversion and Preserving Metadata
Single-file conversion is easy. Real-world libraries are where things get messy.
If you've got a folder full of interviews, lesson recordings, or album tracks, your method matters more than the converter itself. Per-file exporting in a GUI works, but it gets old fast. Audacity can handle MP3 export in the interface, yet forum guidance points out that FFmpeg is commonly recommended for high-volume conversion because it automates repeated jobs more reliably than file-by-file GUI workflows. The same guidance also notes that MP3 quality depends heavily on bitrate, so poor defaults can create avoidable artifacts, according to the Audacity forum discussion on WAV to MP3 conversion.
GUI batch work versus scripted batch work
If you prefer a visual workflow, a desktop app can still work for small groups of files. That's reasonable when you want to review each recording before export.
For larger collections, FFmpeg is usually the cleaner answer.
- Desktop batch workflow: Better when each file needs human review.
- Command-line loop: Better when the rules are the same across the whole folder.
- Hybrid approach: Spot-check a few files manually, then automate the rest.
A simple loop can convert a directory without forcing you to repeat the same menu clicks over and over. Even if you aren't a terminal person, this is one of the easiest automation tasks to learn because the pattern is repetitive.
Metadata is easy to forget and annoying to rebuild
Conversion isn't only about sound. It's also about file organization.
If the MP3 is going into a music library, archive, or shared folder, metadata matters:
- Track title
- Artist
- Album
- Episode or interview name
- Year or project label
When tools support it, check the metadata fields before export. Don't assume they transfer automatically in the way you want. A test file helps here. Convert one track, inspect the tags in your preferred player, then process the rest.
If you're managing released music, metadata discipline goes beyond filenames and ID3 tags. Distribution identifiers matter too, so artists should understand how to avoid lost earnings with ISRCs when organizing commercial releases.
If your source library includes other high-quality formats, you may also need adjacent workflows such as how to convert a FLAC to MP3.
The practical takeaway is simple. For a few files, use the interface you already know. For a lot of files, automate. In both cases, check the first export before committing to the whole batch.
If you need more than simple file conversion, HypeScribe gives you a workflow that can turn spoken audio into searchable transcripts, summaries, and action items after you upload or process your files. That's useful when a WAV or MP3 isn't just something you need to store, but something you need to understand and act on.


