How to Audio Record on iPhone: A Complete Guide for 2026

You leave a meeting, lock your car, and realize the most useful part of the conversation happened in the hallway on the way out. Or you're halfway through a walk when a clean podcast intro lands in your head. In both moments, speed matters more than gear.
That's why the iPhone works so well as an audio recorder. It's already in your pocket, it opens fast, and the built-in tools are good enough for a surprising amount of real work. Notes to self, interview clips, lecture capture, narration, meeting follow-ups, and rough voice drafts all start the same way. You need a recording button that's there before the moment passes.
The process frequently ends with capture. The more useful workflow is capture, clean up, label, share, then turn the recording into something you can search, quote, assign, or publish. That's where an iPhone stops being a simple memo device and becomes the front end of a content and productivity system.
Your iPhone Is Already a Powerful Audio Recorder
The simplest answer to how to audio record on iPhone is also the most suitable approach for general use. Use the app Apple already put there.
Apple's Voice Memos app is the baseline recording method on iPhone. Apple's own guide says you open Voice Memos, tap Record to start, tap Pause to stop temporarily, and tap Done to save. Apple also notes that Voice Memos comes preloaded on every iPhone, so you don't need to install anything before making your first recording. That built-in workflow is documented in Apple's Voice Memos recording guide.
That matters in real life. The best recorder is the one you'll use when something important is happening now, not after setup, login screens, and app permissions.
Practical rule: If the recording is more important than the production polish, start with the built-in app and hit record first. You can organize the file later.
I treat the iPhone as a field notebook with a microphone. For quick observations, post-meeting summaries, and first-draft spoken ideas, the friction is so low that it beats carrying dedicated gear. That doesn't mean it replaces every pro setup. It means it gets you a usable file before the moment disappears.
The advantage isn't just convenience. It's continuity. A voice note can become a transcript, a task list, a quote pull, or a draft for something larger.
The Quickest Way to Record Audio on Your iPhone
If you want the fastest reliable workflow, Voice Memos is it. No signup. No hunting through the App Store. Open, record, save.
Find Voice Memos and start recording
On many iPhones, Voice Memos sits in the Utilities folder. If you don't see it, swipe down on the Home Screen and search for it by name.
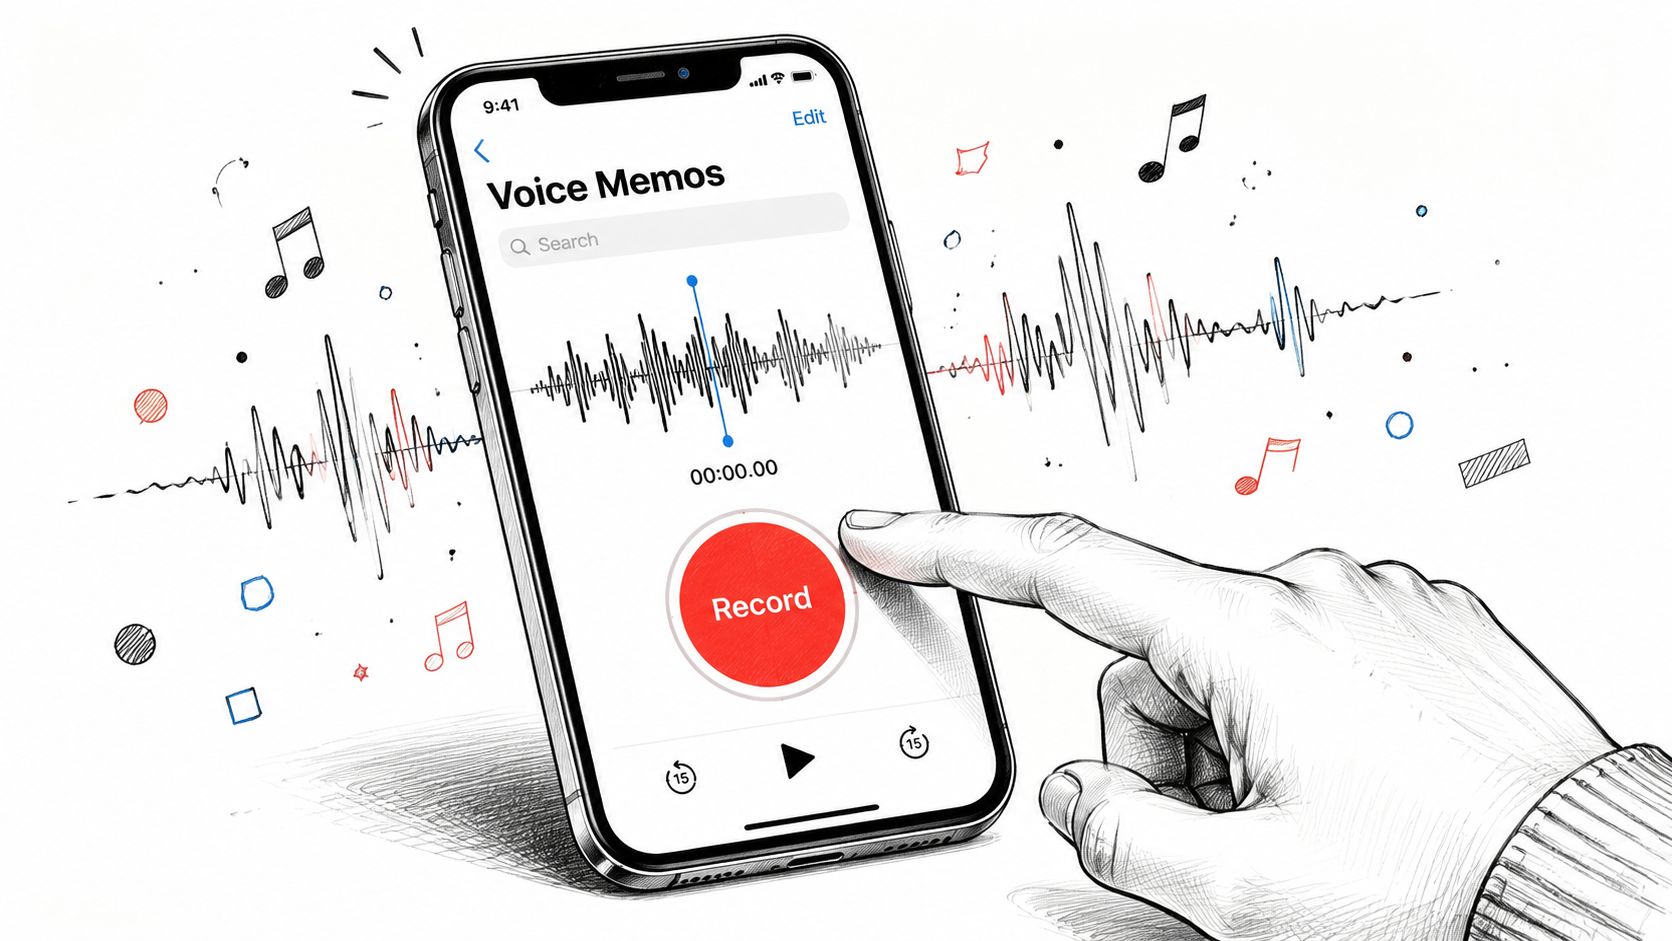
Once it's open, the flow is straightforward:
- Tap the red Record button.
- Speak normally.
- Tap Pause if you need to stop without creating a separate file.
- Resume when you're ready.
- Tap Done to save.
That's the core method Apple documents, and it's still the most dependable answer to how to audio record on iPhone with no extra setup.
Rename the file before you forget what it is
This is the step commonly skipped, and it creates a mess later.
Voice Memos saves recordings automatically under a default name such as “New Recording”, which you can rename afterward. Rename it as soon as the recording ends. Use something you'll recognize later, like:
- Meeting recap for a spoken summary after a client call
- Episode idea for a podcast hook or outline
- Lecture notes for classroom capture
- Interview with source name for reporting work
Descriptive names save time when you need to search, export, or send files to someone else.
A recording with a bad filename is still usable. A folder full of “New Recording” files isn't.
Do the minimum edit that makes the file usable
Voice Memos is not a full editing suite, but it handles the small fixes that matter most.
Use it to remove dead air at the start, trim the awkward ending where you fumble for the stop button, and clean up obvious mistakes around the edges. For reminders, interview logs, and rough narration, that's often enough.
What works well in Voice Memos:
- Quick capture: ideal for thoughts, notes, and interviews that need speed
- Pause and resume: useful for lectures, meetings, and interrupted sessions
- Basic cleanup: enough to trim excess without moving to another app yet
What it doesn't do well:
- Deep editing
- Complex file management
- Multi-track production
- More specialized post-processing
For most recordings, though, the simple workflow wins. Open the app, get the sound, save the file, name it properly. That's the habit that makes the rest of your audio workflow easier.
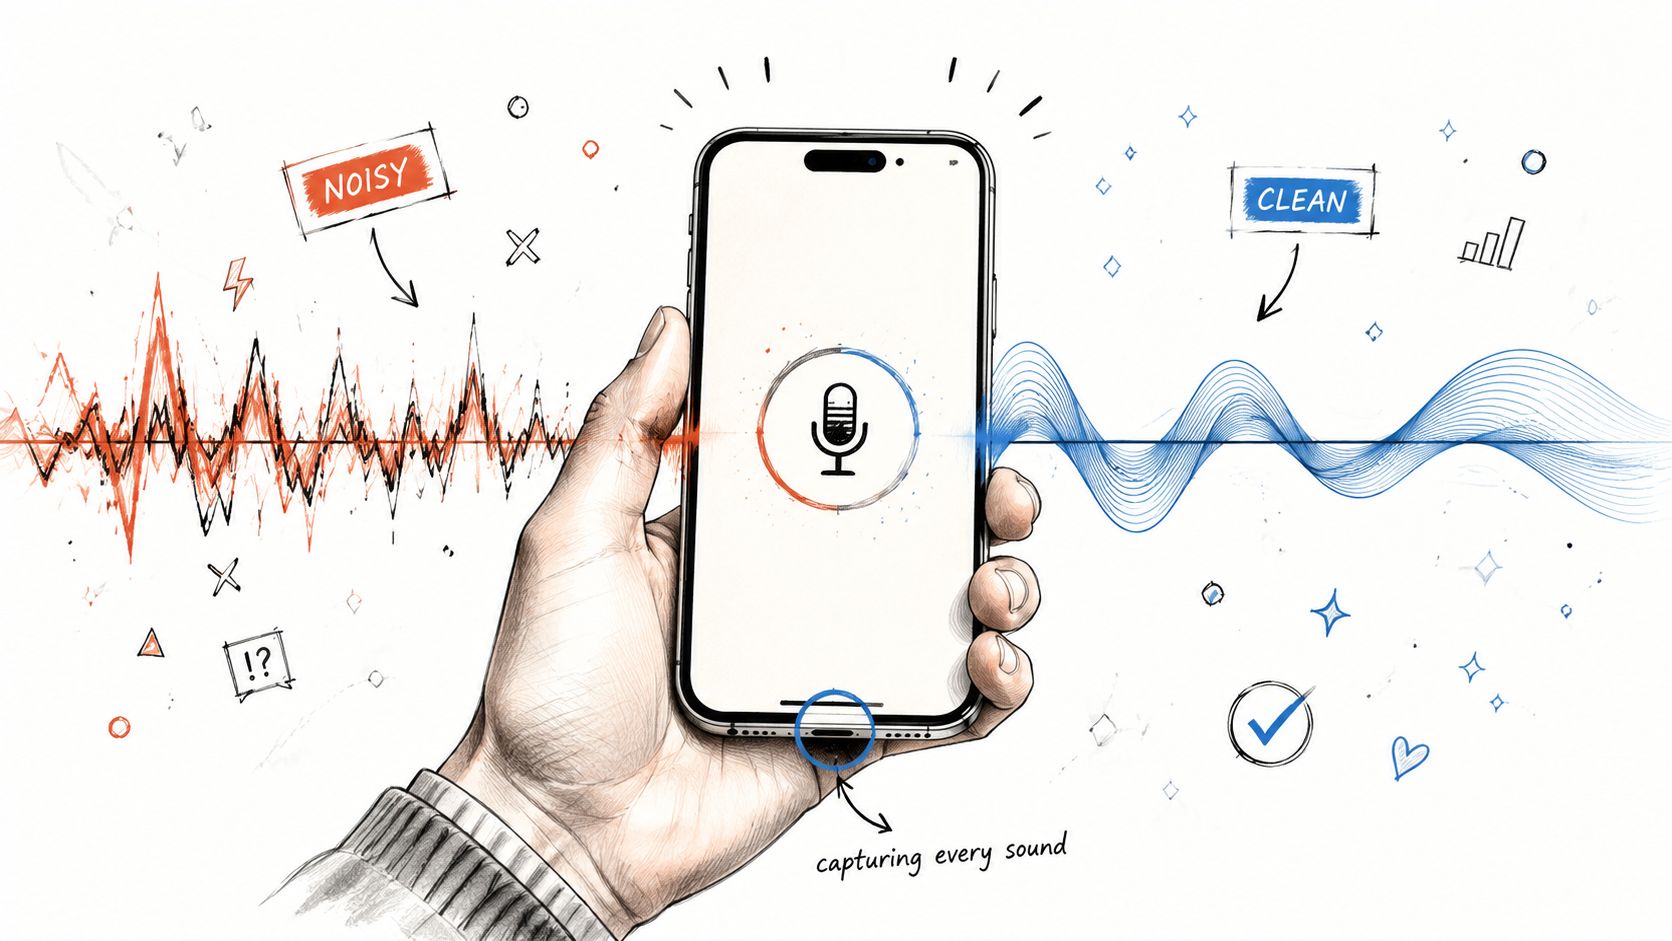
How to Instantly Improve Your iPhone Audio Quality
Good iPhone recordings rarely come from secret settings alone. They come from mic position, room choice, and recording habits that reduce problems before they get baked into the file.
Fix the room before you fix the app
The iPhone microphone is better than many people expect. Rooms are usually the bigger problem.
Hard surfaces create echo. Air conditioners, coffee machines, road noise, and laptop fans all compete with speech. If you want cleaner audio, move before you record. A smaller room with curtains, rugs, upholstered furniture, or even a parked car often sounds more controlled than a big kitchen or conference room with glass and bare walls.
For one voice, keep the phone fairly close and stable. For two people, place it where neither speaker has to lean or shout. For group discussions, the iPhone can still work, but you'll get better results when everyone stays seated and speaks one at a time.
Use the quality setting that matches the job
There is one setting worth checking if fidelity matters.
The iPhone lets you adjust recording quality in Settings > Voice Memos > Audio Quality, and the University of Texas instructional wiki notes that Voice Memos uses the MPEG-4 codec and that users can choose Lossless for the highest-quality output in the UT guide to recording audio with your phone.
That setting is worth changing when the recording needs to hold up for transcription, quoting, or archive use. For throwaway reminders, the default may be fine. For interviews, lectures, spoken drafts you'll reuse, or narration you may publish later, higher quality is usually the safer choice.
Cleaner source audio makes every later step easier, especially editing and transcription.
A quick visual walkthrough helps if you want to tighten your setup habits:
Small choices that make a big difference
You don't need a studio to improve your files. You need consistency.
- Hold the phone still: handling noise ruins otherwise usable speech.
- Aim the mic intentionally: don't bury the bottom of the phone in your hand or jacket.
- Turn off distractions: buzzing notifications, table taps, and keyboard clicks all get picked up.
- Do a short test first: listen back before the interview or lecture starts.
- Use an external mic when the environment is rough: a simple lavalier can help when you're recording in noisy spaces.
What doesn't work well is assuming software will rescue a bad recording later. Some cleanup is possible. Muffled, echo-heavy, or distant speech is much harder to salvage than people think.
Advanced Recording for Specific Scenarios
Once you've got the basic Voice Memos habit down, the iPhone can handle more specialized recording jobs. The trick is matching the tool to the situation instead of forcing one workflow onto everything.
Recording your screen with your voice
If you're making a tutorial, app walkthrough, or quick client explainer, use the built-in screen recorder from Control Center. Apple documents that the iPhone's screen recording tool supports a microphone toggle, so you can capture your screen and add spoken narration in the same session. Apple also documents Local Capture for recording audio and video from videoconferencing apps, along with an input selector and Voice Isolation in Control Center, in Apple's guide to recording audio and video.
That setup is more practical than people realize. It's useful for:
- Tutorials: showing taps and swipes while narrating the steps
- Presentations: recording a walkthrough of slides or mobile prototypes
- Remote calls: capturing what's on screen while being more deliberate about the audio input
If your work leans toward mobile-first production, this is also a useful companion to podcasting with an iPhone.
Long lectures and meetings
Long sessions create a different set of problems. Battery drain, interruptions, sloppy filenames, and poor placement cause more trouble than the record button itself.
For lectures or extended meetings, do the boring prep:
- Put the phone in Airplane Mode if interruptions are a risk.
- Set it somewhere stable, not in your hand.
- Check available storage before you start.
- Rename the file immediately after the session.
- If you pause, resume carefully so you don't assume the app is still rolling when it isn't.
A phone on a vibrating conference table tends to capture every knock and notification buzz. A phone placed on a soft notebook or stand usually gives you a cleaner result.
Recording calls and presentations inside apps
Recording remote conversations is where many users get tripped up. The iPhone is capable here, but you need to pay attention to what audio source is being captured.
Apple's Local Capture options and input controls matter because they reduce the chances of grabbing the wrong source or ending up with weak voice pickup. Voice Isolation is particularly useful when background noise competes with the speaker during presentations or calls in conferencing apps.
The practical lesson is simple. Test the setup before the actual event. Complex capture fails most often when nobody verifies the input path in advance.
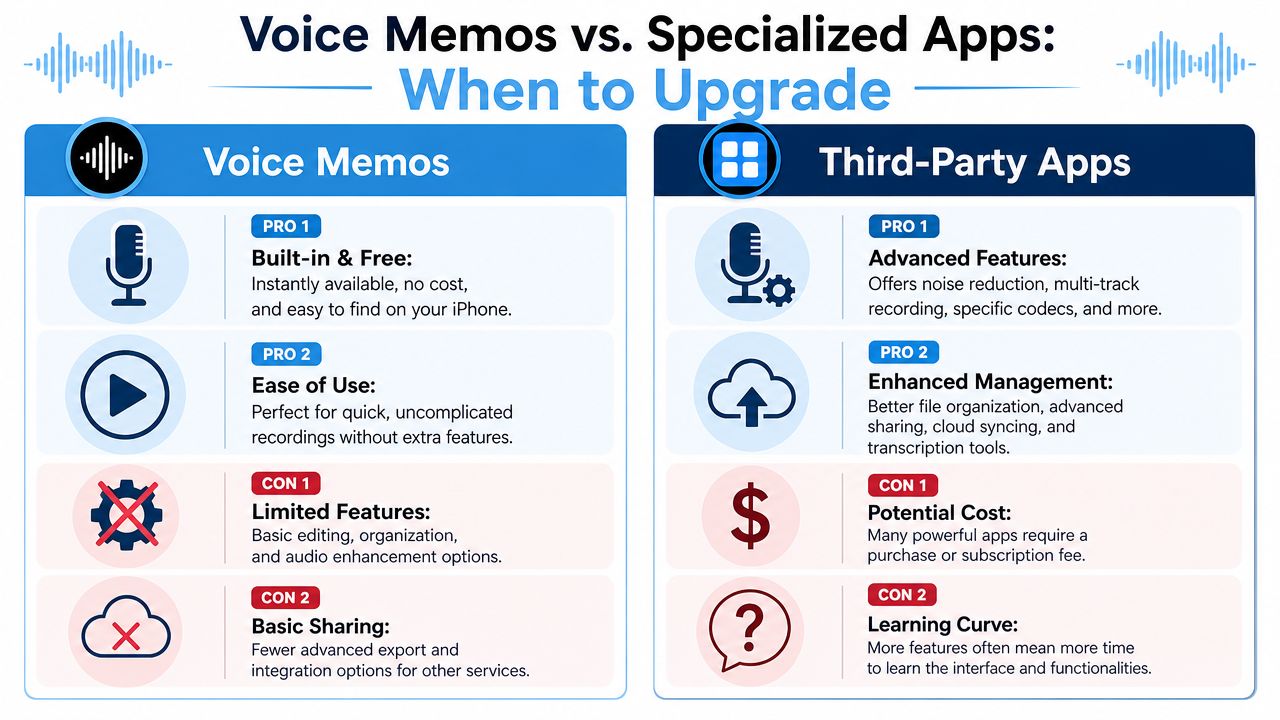
When to Use a Third-Party Recording App
Voice Memos is excellent for speed. It's not always enough for production.
The moment you need deeper editing, better file handling, more export control, or project-specific features, a dedicated recording app starts to make sense. Journalists, podcasters, musicians, and heavy meeting users usually hit that limit sooner than casual users do.
Where Voice Memos starts to feel small
Voice Memos does three things very well. It starts quickly, saves reliably, and lets you make simple edits.
It feels restrictive when you need more than that. The pain points usually look like this:
- Interview work: you want better organization or easier handoff into a transcript workflow
- Podcast production: you need more control over edits and exported files
- Music or layered audio: you need tools designed for more than one clean spoken track
- Heavy archive use: you want stronger naming, sorting, and project management
That's where specialized apps earn their place.
What to compare before you upgrade
Not every third-party app solves the same problem. Some focus on editing. Others focus on file management, syncing, or transcription workflows.
| Feature | Apple Voice Memos | Professional App (e.g., Ferrite) |
|---|---|---|
| Setup speed | Built in and ready immediately | Requires install and setup |
| Learning curve | Very low | Higher, especially for editing-heavy use |
| Editing depth | Basic trimming | More advanced editing controls |
| Project organization | Simple | Better suited to larger audio libraries |
| Export flexibility | More limited | Usually broader and more production-friendly |
| Best fit | Quick capture | Ongoing production and more complex workflows |
A good rule is to upgrade only when the missing feature is slowing down real work, not because a more advanced app looks impressive.
If your recordings mostly become notes, interviews, or reminders, stick with Voice Memos longer than you think. If your recordings become deliverables, a pro app is easier to justify.
If your main use case is meetings rather than media production, it also helps to think beyond recording itself and toward what happens after the file exists. That's the gap discussed in this guide to apps for recording meetings.
From Recording to Results Managing and Transcribing Your Audio
A recording has value only if you can find it later and do something with it. That's where many iPhone audio workflows break down. People record consistently, then dump everything into a pile of vaguely named files they never revisit.
Manage the file like it matters
Start with habits, not software.
Rename each recording right away. Share it as soon as it belongs somewhere else. If the file supports a project, move it into that project's system quickly instead of leaving it buried in Voice Memos.
The practical sharing options are the familiar ones:
- AirDrop when the file needs to move to a nearby Apple device
- Messages or Mail when you're sending it to someone else
- Cloud storage when the recording belongs in a broader team workflow
This is also the stage where spoken content turns into text. That's usually the point where the recording becomes searchable, skimmable, and assignable.
Turn speech into something usable
Manual transcription is slow and error-prone. Even when the recording is short, typing it all out creates friction that makes people postpone the work.

One practical option is HypeScribe, which accepts uploaded audio and video files, including common iPhone-friendly formats such as M4A, and turns them into searchable text, summaries, and action items. If your workflow starts in Voice Memos, this is the kind of handoff described in HypeScribe's guide to Apple Voice Memo transcription.
That workflow is especially useful for:
- Meetings: turning spoken discussion into notes and follow-ups
- Interviews: making quotes easier to review and search
- Lectures: converting long recordings into text you can scan
- Content creation: turning rough voice drafts into editable copy
The larger point is simple. Recording audio on an iPhone is the first step, not the finish line. Once the file becomes text, it becomes easier to organize, share, summarize, and act on.
Frequently Asked Questions About iPhone Audio Recording
Some of the most important questions about iPhone recording aren't about where the record button is. They're about edge cases, legal limits, and whether the phone will keep working once your workflow gets more demanding.
Can you record phone calls on an iPhone
This is the question people ask most, and it needs a careful answer.
Phone call recording depends on technical limits, app behavior, and local law. Consent rules vary by place, so the practical standard is to get clear permission before recording any conversation. If you need a record of a call for work, the safer route is usually to use an approved conferencing or meeting workflow where all participants know the session is being captured.
If your priority is private dictation or speech capture without relying on a live connection, Verbex's guide to offline voice apps is a useful companion read because it focuses on offline voice-to-text options rather than call recording tricks.
Can Voice Memos keep recording while you do other things
In normal use, yes. Voice Memos is suitable for ongoing capture while you move through a session, and the pause-and-resume behavior is part of Apple's documented workflow. That makes it useful for longer recordings where you may need to interact with the phone briefly or stop and continue without creating separate files.
The smart move is still to verify the recording is active before you put the phone away. A quick glance avoids the classic mistake of thinking it's rolling when it's paused.
What kind of external microphone should you buy
Choose the mic based on where the phone will be and how many people are speaking.
- Lavalier mic: good for one speaker who needs consistent voice pickup while moving or standing
- Shotgun-style mic: better when you want directional pickup in front of the phone
- Desktop USB-C mic: useful when the iPhone is part of a more fixed recording setup at a desk
The wrong mic can be worse than no mic if it adds cable friction, mounting issues, or setup delays that stop you from recording at all.
What's the most common recording mistake
People start too late, place the phone badly, and never rename the file.
That combination is more damaging than not having advanced gear. If you capture early, control the room, and label recordings immediately, your iPhone audio workflow becomes much more dependable.
If you already record meetings, ideas, interviews, or lectures on your iPhone, HypeScribe gives you a straightforward next step by turning those files into searchable transcripts, summaries, and action items you can use.


